
Framing complete. Sizing crisis averted.
After only five weeks, Scott and the three man crew at Alexander’s Custom Homes have successfully completed framing of the house. They will be back to install the windows and several other things later, but the bulk of their work is done… and done extremely well.
Here is the timelapse of framing phase:

I mentioned in my last post that we encountered a few sizing “issues” during framing, two of which were solved by minor shifts in interior walls, and one of which was unsolved.
The unsolved issue centered around the feeling that, at less than 12 feet, the master bedroom was too shallow. While 12 feet is a perfectly livable depth for a bedroom, it just seemed too cramped, especially for a house designed from scratch for its owner. The girlfriend and I both felt the entire master suite was just too small so we asked Build for options, priced out. The options were:
- Move the entire exterior west wall of the master bedroom two feet west, enlarging the bedroom depth by two feet and shrinking the deck depth by two feet. This seemed like the most attractive option, but it was also by far the most difficult because it posed far-reaching structural problems. Turns out we would have had to re-beam a good portion of the house all the way from the north to the south. Approximate cost: $14,000.
- Same thing as above but move the wall six feet west instead, to the edge of the deck, eliminating the deck. This was a lot easier structurally, but losing the master bedroom deck did not seem good. Approximate cost: $10,000.
- Move only the section of the west wall that is glass two feet west, leaving the structural part of the wall in place. This poses no structural issues, shrinks part of the deck to a 4 foot depth and leaves the other part at a full 6 feet. Approximate cost: $1,500.
- Steal a foot from the already small master bathroom and walk-in closet. Approximate cost: $500.
- Do nothing. Cost: only disappointment.
After some heavy thinking, option 3 arose as the clear winner. It accomplished the objective of enlarging the master bedroom, didn’t cost too much, and it even improves the deck in a way, since the six-foot-depth area is a bit more private now.
So, sizing crisis averted!
There are a few very important things I learned from this process:
- I can’t stress how relieving it is to have a design/build firm whose interests are completely aligned with mine and who isn’t interested in nickel-and-diming me for every little change order that comes along. With many traditional architects and G.C.s, even meeting about such a change would “start the meter” so to speak. Build has been great through all modification requests and I feel very lucky to have a team that cares as much as they do.
- Not withstanding the above, I am a bit mad at myself for not doing more during design stage to ensure the house was sized appropriately. In looking at plans, I tended to concentrate on the more obvious questions like “where is the kitchen in relation to the living room and dining room” and “how many bedrooms are on the same floor at the master”. I really never scrutinized actual dimensions of rooms because I just figured there was a standard size for everything that would be either met or exceeded. What I should have done is physically laid out string in an open space somewhere to match the dimensions of each room in the house. Just a quick “reality check”. This lesson gave me a great idea for an invention/business that I may pursue at some point. The bottom line, however, is that it doesn’t matter who your architect is… they are going to design what they think works and if you don’t have the data to know otherwise and say something, you’ll end up with questions and change orders.
- In this phase of the project, I will freely admit that I have gone from a “low to medium maintenance” client to a “high maintenance” client, and I think I know why: I am a web designer. My world is not a world in which I spend months planning things with the intent of building them out to the meticulous specs of the plan. My world is a world in which you have an idea, mock something up, prototype a little, iterate, launch, and then keep iterating after that. The foundation is never set, the walls are never nailed, and the paint is never dry. Working on the web is an infinitely iterative process and designing a house is the opposite of that.
Costs accrued during this stage:
| Lumber | $10,732.24 |
| Lumber | $25,656.30 |
| Lumber | $1,605.84 |
| Honeybucket rental | $117.19 |
| Structural engineering services | $232.50 |
| Structural engineering services | $155.00 |
| Structural engineering services | $775.00 |
| Printing/Reprographic fees | $27.00 |
| Framing supplies | $1,774.59 |
| Framing supplies | $380.65 |
| Framing supplies | $714.93 |
| Framing labor | $4,565.87 |
| Framing labor | $27,813.40 |
| Framing labor | $5,412.38 |
| Framing labor | $5,625.25 |
| Wood debris hauling | $1,089.00 |
| Wood debris hauling | $1,089.00 |
| Fence Rental for 6 months | $438.00 |
This is so true. I’ll keep this in mind if/when I design my home.
I’m seeing a timelapse of deconstruction rather than framing.
Great post; love the time-lapse videos. Why do you have duplicate line-items for four of the categories in the costs table, though?
Mike: Oops, I had a bug where if two timelapses were on the same page (like on the front page of the blog), it only showed one of them. Fixed now… thanks!
Rob L: That was just based on separate invoices coming in. I could probably combine them.
It’s often hard to tell the how spacious a room ‘feels’ until drywall is installed, sometimes even until the entire construction work is complete, the room is painted, and the furniture is installed. There are many factors that influence how we feel in a space, including the quality of light, paint color, arrangement of mirrors, views into adjacent indoor and outdoor spaces, etc. etc. All this is to say that judging the size of a room at the planning stages is best done by an experienced design professional. Any other attempt to do so before everything is done (looking at the room with only framing completed, mocking up the space with string/chalk) can be very misleading.
Thanks for sharing the ups and downs and the awesome time lapse. I am in the midst of vastly smaller in scale remodel – and there are times when you need to make adjustments on the fly sometimes actually to a better outcome… I can commiserate with that the feeling in your gut when you wake up after finding a serious issue with your well laid plans and then the relief and sense of accomplishment when you face the problem – look at it each of its facets and come to a solution and move on.
Good luck with the next steps mike – how do you plan to furnish and landscape? I cant wait to see the plans for landscaping that awesome property. Again garden design is a must for every new home owner ( http://www.gardendesign.com/ ) l
Great post Mike and good job to Build being able to provide options with prices attached. Understanding what information someone needs to make informed decisions is critical to a positive outcome.
Great time-lapse. Wish the freight container hadn’t been there, but you can’t do much about it.
Always does make you wonder when your framing crew buys a new(er) truck halfway through the project, though, doesn’t it? ;)
Ariel: Very true, except what feels comfortable to a design professional doesn’t always feel comfortable to the client. That might be why some architects just make everything really big by default: to eliminate the “too small” factor. In the end, it’s probably best to let your architect suggest dimensions on things, but I think it’s just smart to verify for yourself if possible.
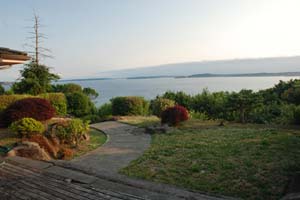
Andrew: I’ve been told that usually what happens when you build is that you get to the end of the project and you’ve spent so much that you decide to punt on the landscaping for awhile. We’ll see what happens. Luckily, the backyard really doesn’t need much more than a good lawnmowing, but the front definitely needs some serious work.
Karl: Yeah, the container bums me out a little as well, but what are you gonna do? As for the truck, yeah, I noticed that too… Scott deserves it though. Really hard worker.
Super post Mike! It is exciting to follow the process and see how different it is from what we are used to here in Belgium. Wooden structures are really a minority here. Watched the photos too and your view is spectacular!
Geert: What sort of construction is most prevalent in Europe? Steel? Brick?
Mike, almost all houses are brick here in Belgium.