
How the front yard came together
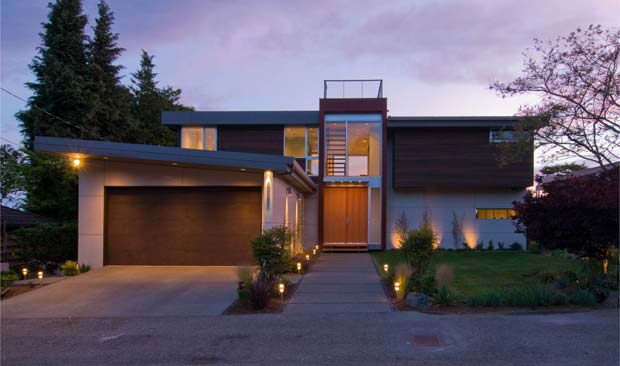
The front yard and and landscaping turned out to be one of the most pleasantly surprising parts of the entire project. Having never owned a house before and knowing very little about gardening or landscaping, we assumed the (one woman) team at Alexandria’s Creations would do a nice job for us but that we’d probably want to change a lot of stuff later on. Alex’s work, however, has turned out so beautifully that we don’t foresee wanting to change a single thing, provided all plants adapt nicely to their new environment.
A few months ago when landscaping work began, I posted details of what was going in where so I won’t rehash that again, but there are a few other details to discuss, now that everything’s done.
Irrigation
For one reason or another, I decided to axe irrigation from the budget early on… probably because we were looking for stuff to cut in order to hit a number. As landscaping plans came into focus, however, it became clear that skipping irrigation now would only mean a year or two of laborious manual watering followed by a destructive installation of proper sprinklers later. For that reason, we added it back into the plan just in time and the folks at the Hale Company came in and did a wonderful job for us. Because the driveway was already poured, Gary and the Hale team had to bore a small hole underneath it to run water there, but other than that, the install went smoothly and took about a week.
We created 4 sprinkler zones for the front and side yards and ran a water line to the backyard for if and when irrigation would be installed there. In order to tie the irrigation into our home automation system, we used the Rain8Pro from WGL Designs. It’s probably the single ugliest piece of equipment in the entire house, but it’s also one of the best irrigation controllers on the market. Because it ties directly into the automation system, we can trigger it with moisture sensors, on a timed schedule, or even from a web browser or iPhone.
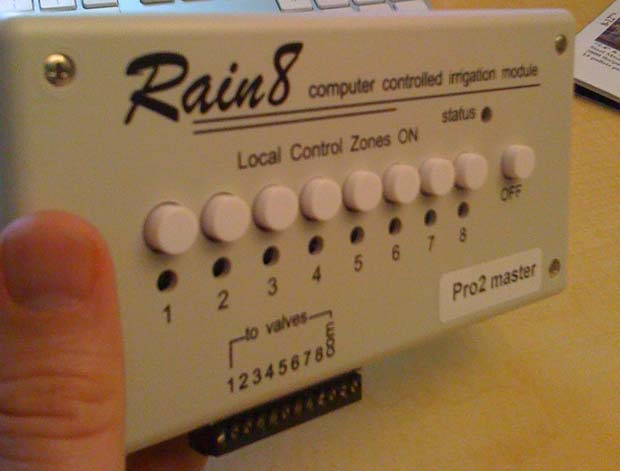
The Rain8: Beaten repeatedly with an ugly stick but still outperforms its peers.
The Lawn
So far, the lawn has not proved to be very difficult to maintain. It needs a little more watering than the plants, but since it’s flat and not very big, I can cut the whole thing with a manual push mower in less than 10 minutes. We’ll see how long I go until calling a neighborhood kid in to do it, but right now, I don’t mind it at all. I think there’s a difference in having a lawn you have to mow versus a lawn you want to mow. Right now, I’m in the second camp.
The Lighting
Landscape lighting isn’t too complicated of a subject once you get the hang of it, but I have to say, it’s pretty hard to find nice looking modern landscape lights. It seems like 99% of all landscape lights are either very traditional or very cheap looking. I thought briefly about using solar lighting, but after trying it in the back yard, I found it doesn’t really flood areas with any reasonable amount of light. The ones I found all used a tiny single LED bulb which only spread light across about a two foot radius… and spottily at that.
Through the advice of someone on Twitter, I called Sidney Genette at Lighting Designs and hired him to put together a basic lighting plan for the front yard. I didn’t end up using the equipment he spec’d because I found fixtures I liked even better, but Sidney’s plan successfully lit up our paths, our lawn, and our plants.
We ended up going with some pretty expensive downlights in the BK Lighting Alpine PAR 30 (purchased from Stoller Inc.), some moderately priced path lights in the Hinkley 1579SS (purchased from LightingSale.com), and some super cheap uplights in the Malibu 20 watt cast metal flood (purchased from Home Depot).

These are the BK Lighting downlights. Solid as hell. Maybe 15 pounds each. Kind of overkill though.
The Hinkleys are the real superstars, lighting up the walkway to the front door and providing a nice, modern, subtle accent to the concrete path, even in the daytime. If the Hinkleys are an A, the next closest path light I found was maybe a C-.
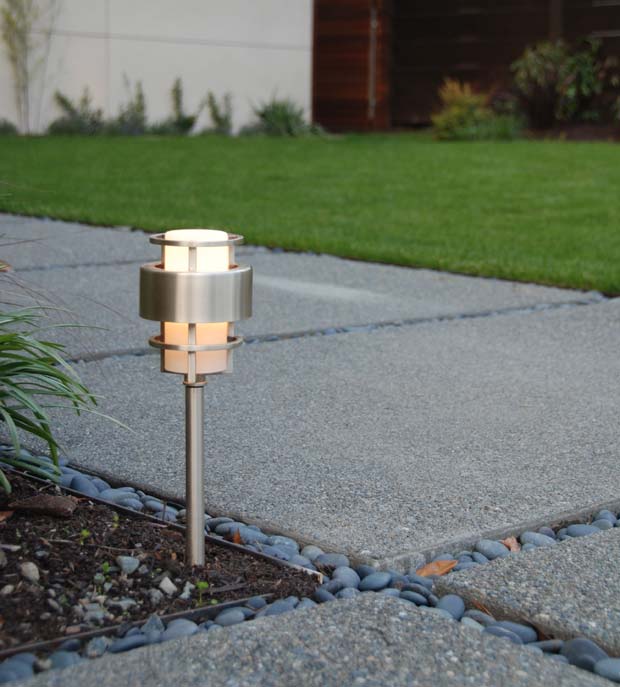
Mmmm, the Hinkleys. So modern, so smooth, so perfect.
Next Up
Since we did so well on the overall house budget, Alex will be coming back in a week or so to landscape the back yard. It’s already beautiful so I can’t wait to see how it turns out.
I just posted a bunch of front yard photos to the photo gallery, so feel free to check them out here.
Costs accrued during this stage:
| Landscaping design, labor, and plants (Alexandria's Creations) | $7,858.04 |
| Landscape lighting design (Lighting Designs, Inc.) | $522.50 |
| Irrigation system (Hale Company, Inc.) | $5,840.44 |
| Front lawn soil prep and landscaping (Blackhawk Construction) | $5,985.27 |
| Rain8 Pro2 sprinkler controller (automatedoutlet.com) | $201.49 |
| Cedar fencing (Special Projects Division) | $558.45 |
| Miscellaneous landscaping (Brett Deerly) | $610.40 |
| Fence refinishing/reconditioning (PJ Construction) | $1,040.25 |
| BK Lighting Alpine Lights (Stoller Inc) | $528.34 |
| Hinkley Path Lights (LightingSale.com) | $1,274.40 |
| Malibu Uplights (Home Depot) | $87.34 |
Really looks beautiful – kudos to Alex. Can’t wait to see the backyard and how it comes out too! (Just hoping you don’t end up really using a sword…)
Out of curiosity: why did you go with a lawn at all? Why not have a “natural” or more plant-based landscape?
DM: I like the look of a lawn slightly better than ground cover so I thought I’d give it a shot. If it doesn’t work out, I’ll switch to ground cover. Going with ground cover entirely in the back yard.
The yard looks great, especially with the landscape lighting.
What kind of rocks are those lining the concrete-slabbed walkway and where did you find them? Very nice looking…
Hi Tony. They are mexican beach pebbles. Purchasable through most rockery type stores. They come from Mexico or San Diego originally, I believe.
Love your landscape. I am trying to build the concrete box with mexican beach pebble with grass next to it similar to your front yard. Would you mind sharing
(1) Beach pebbles: my contractor thinks they will be hard to maintain. Leaves and dirt will cover them over time and weeds will grow on them
(2) How do you mow the grass next to the pebble path? We have large windows. I am worry that the lawn mower will kick up the pebbles and break the windows.
(3) What edge materials do you use as the border? My contractor thinks those borders eventually fall down and the edge wont look good after a while
(4) What’s the width of the Mexican beach pebble border in your front yard and what size is the concrete pad? What size is the beach pebble – is it 1-2″? My front door area is 7′ wide and I am trying to figure out the size of the concrete box and the pebble strip between the boxes.
My landscape contractor has not done this type of design before, so I am a bit nervous on how it will turn out. I would appreciate if you could share your experience on how the design work out after a couple of years.
Thanks!
Hi Amy. Answers below:
1. Nope, not hard to maintain at all. They stay in place just fine and look exactly as they did when they were laid.
2. The pebbles are way too big/heavy to get kicked up by a lawnmower. They are about 2 inches long.
3. Steel, I believe. Again, they look just as they did when they were put in.
4. Pebbles are a couple of inches long-ish. I don’t know what you mean by “concrete pad”.
It sounds like your landscape contractor may not be well equipped for this job. It didn’t seem difficult at all to me, but you probably don’t want a first timer doing it.