Archive for September, 2010 —

A short post about the fireplace, the stairs, and the awesomeness of Bart

In the web business, there is a chain of people involved in most projects. Chronologically speaking, it goes something like this: client (who hires the firm), account planner (who writes the brief), designer (who designs the mocks), engineer (who writes the backend), and then the “front-end developer” (who puts all of the pieces together and makes the finished product work). As anyone in the web business knows, the person who often gets the short end of the stick is that last cog in the chain. Any number of delays or problems can occur earlier in the chain, and the last person is still expected to hit the agreed upon date.

In the design/build process, that person is the builder/foreman, and at Build LLC, that person is Bart Gibson. As Kevin, Andrew, and I muck around on details, drop the occasional ball, or change our minds on something, Bart is still expected to make all the ends meet, on time and on budget. Not only did he do exactly that — stage after stage, nail after nail — but he also lent his craftsmanship to two notably custom parts of the house: the blackened steel fireplace surround and the open bamboo stair treads.

The fireplace surround

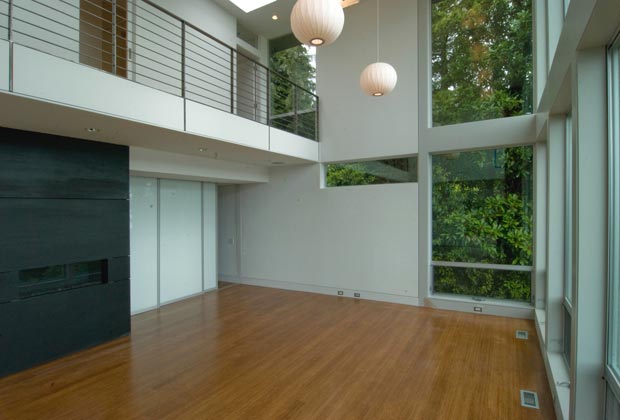
As mentioned in We Have Fire, we ended up going with a modern Heat N’ Glo Cosmo fireplace. It’s a clean looking unit, but recessed into drywall, it doesn’t command a ton of attention. To give it more presence in the great room, Bart fabricated a custom blackened steel surround for it. The steel panels create a striking vertical stack while also providing a thermal mass heat conductor to more efficiently radiate heat throughout the room. Apparently you can blacken steel using either a hot or cold process. The hot process is extremely dangerous however (and can kill you) so thankfully Bart used the cold. It looks really great.

The bamboo treads

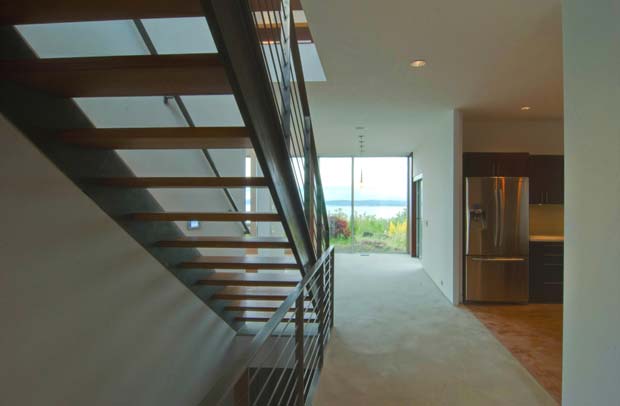
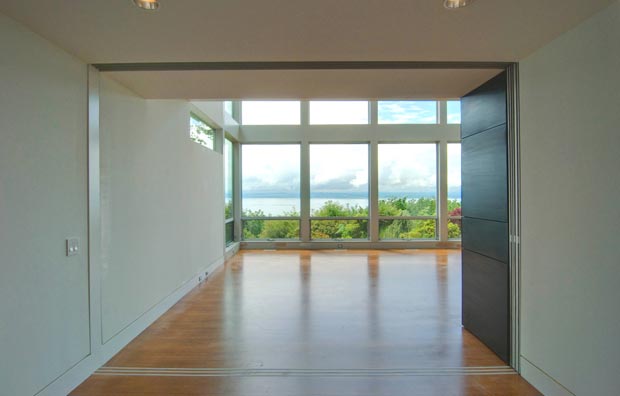
It’s very hard to find open stair treads that are more than an inch thick and don’t have unsightly bullnoses on them, especially in bamboo. Open tread regulations are much stricter than they were a few years ago because of fears that a child could fall through the treads, but if you plan correctly, you can fabricate custom stairs that are plenty safe but also minimal in appearance.

Starting with large slabs of bamboo plywood, Bart built each two-inch thick stair tread by gluing two one-inch slabs together using a special cut such that the whole thing looks like one two-inch thick solid piece of bamboo. They are really, really beautiful, and because Bart stained each one individually, they match the bamboo floor almost perfectly. If you’re looking for a really clean open tread design, this is a great way to go. The stairs took quite a bit of massaging to get perfect but Bart and the team at Build pulled it off flawlessly.

Costs accrued during this stage:

Blackened steel fireplace surround (Bart)$3,500.00
Stair tread parts and labor (Build LLC)$9,372.50

Smarter Space Usage with Sliding Doors

One of the things that can make a house feel too big is an abundance of hallways and rooms. You know the style: you walk in and there are three hallways leading to different places. You walk down one and it leads to a couple of bedrooms and a study. You walk down another and it spits you out in another bedroom, the kitchen, or the rec room. Yet another leads you to the living room, a bathroom, and another spare room. Tightly tunneled houses can feel very wasteful, and especially if you don’t have a big family in the house, many areas of the house feel unused.

We wanted to create big, open spaces in the house, not only to maximize the views but also to make the most of the circulation space throughout the house. This strategy produced a house that is great for entertaining and everyday living, yet doesn’t feel too big or unused. In order to shrink some of these open spaces when we need to, however, we used Raumplus sliding glass doors in three strategic locations throughout the house: the great room/TV room junction, the kitchen/office junction, and the upstairs laundry area/hall junction. The sliders between the great room and the TV room serve an additional purpose in that they darken the room during bright days, allowing for more pleasant TV viewing.

We chose Raumplus system because they are sharp looking and slide along a barely noticeable set of rails set flush into the floor.

Here’s what the doors look from the TV room, tucked away behind the fireplace

… and here is a view from the opposite side, when they are closed

Costs accrued during this stage:

Raumplus sliding doors$11,189.75

Hardscape Detail

One of the most successful aspects of the entire project, without question, has been the hardscaping. Not only were the contractors — Jim and Jim of Blackhawk Construction — among our favorite people to work on the job, but we feel like we got a lot of really sharp looking exterior concrete work done for a very reasonable price.

Concrete comes in many flavors. It’s often hard to explain exactly what you are looking for, so early on, we searched the neighborhood for samples that looked nice. Luckily, there was a driveway only a few blocks away that featured exactly the style we had in mind: medium grey with a finer than normal aggregate. The finer grain provides a more modern look in our opinion, so we had the Jims whip up a few samples to look at. They nailed it on the first try and immediately began work on our back steps, our side walkway, our front pavers, and various other concrete forms around the exterior of the house.

Another touch we added was the placement of Mexican beach pebbles between the pavers and surrounding other parts of the house. Though ostensibly Mexican, they provide a very Japanese feel. We ordered them from Coverall Stone.

Make sure to check out the full hardscape photo collection in the photo gallery.

Costs accrued during this stage:

Gravel (Salmon Bay Sand and Gravel Co.)$876.08
Concrete work (Blackhawk Construction)$20,119.27
Concrete stairs, wall, and other hardscapes (Blackhawk Construction)$5,985.27
Concrete treads for garage landing (Diamond Concrete Products)$547.96
Steel rails bordering path pebbles (Everett Steel)$406.51
Exterior stairs (Olda Zinke)$2,069.55
Delivery charges (Pacific Delivery Service)$272.71
Mexican Beach Pebbles (Coverall Stone)$1,340.00

Doorbells, Numbers, Mailboxes, and Carpets

As I get ready to post the final costs for the project, I have two entries to sneak in first: this one covering several items and another one covering decorative lighting.

The doorbell

For the incredibly affordable sum of $50, we got ourselves a sexy Spore True doorbell, and I have to say, it is money. Not only does it look great but people actually love pressing it. One pizza guy even said he’s never had the urge to press a doorbell a second time until he pressed this one. Not that you should be worried about what pizza delivery people think about your doorbell, but I’m just sayin’…

House numbers

Seeing as Build designed the house to evoke a midcentury esthetic, we figured we should get house numbers set in a typeface that was inspired by that era. Neutraface was the obvious choice, and conveniently, Design Within Reach sells house numbers set in this face.

The mailbox

Although brands like Blomus make great, modern mailboxes, $320 is just a ridiculous sum to pay for a container that I wish I never had to use. Happily, I found this little jobbie at Chiasso for $78 instead. It does the job just fine, but I still look forward to the day when I can turn off my mail service entirely.

Carpeting

Carpeting just isn’t a sexy subject these days, but almost every house has at least a little of it, and ours is no exception. We chose high quality berber carpeting for the upstairs bedrooms and cheaper berber for the basement. We got our carpeting from Decor Carpet One of Bellevue and it turned out great.

Costs accrued during this stage:

Berber carpeting (Decor One)$11,235.16
Mailbox (Chiasso.com)$78.00
House numbers (Design Within Reach)$193.42
Spore Doorbell (Lumen.com)$50.40

Interior Lighting Detail

Finally, we come to the final post on this blog that involves a stage of the project and the expenses associated with it. Whew!

Onto the subject of the post: lighting.

I came into this construction project liking one type of lighting above all others: indirect lighting. Indirect lighting usually comes in two flavors: cove lighting and sconce lighting.

That’s three sentences in a row with colons, by the way.

Cove lighting is a style of lighting that conceals the entire light fixture behind a ledge in the wall such that you only see the reflection of the light on the walls and ceiling but never the light itself. It’s a warm, subtle effect that gained popularity in midcentury design and can still be seen in modern projects today.

Sconce lighting also hides your bulbs from view but within a wall mounted fixture instead of behind a ledge. Sconces are more popular in traditional interior design than modern interior design but there are some great examples of how they can be used even in the most modern of settings.

As much as I like both of these forms of indirect lighting, we didn’t end up using them in the house. The clean, minimalist lines of the house just seemed like a better fit for recessed can lights and hanging pendants. This strategy provided us a cost-effective way of lighting most of the areas (cans) and a decorative, changeable option for selected areas like the kitchen, dining room, and great room (pendants).

For the cans, we went with some pretty standard Lightolier 4 and 5 inch enclosures which aren’t worth discussing much. All of them point straight down now but we’ll be replacing several with pointable eyeball-style ones to direct light more dramatically at a few walls.

For the pendants, we had three areas to outfit: the great room, the dining room, and the kitchen. Fortunately, we found these George Nelson Criss Cross lamps right away and ordered three of them to hang low in the great room. To light the ceiling in the great room, we went with eight fairly cheap Lite Source Olwen Contemporary 3 Light Pendants. We felt fairly confident in our choices for the great room so dropping $2000 and change for the 11 fixtures was not a huge deal.

For the dining room and kitchen, however, we were much less confident. Because we had to purchase the lights before the cabinets, floors, appliances, and furniture were in, it was a big leap of faith to purchase anything. We comprehensively scoured several major online lighting sites (with tens of thousands of items each) as well as visiting some local lighting stores. After weeks and weeks of combing, we settled on a short list (!) of about 15 fixtures for the kitchen and 15 for the dining room. We then sent the list over to team Build for their expert opinions and they whittled the list down to a few for us.

Even with the comprehensive searching and comprehensive whittling, we felt there was a good chance we wouldn’t love our choices after the rest of the house came together so we did the safe thing: we picked relatively safe, inexpensive choices from the list knowing we might replace them soon. The choice for the kitchen was four Lite Source Ethel Transitional Pendants because they matched the wenge cabinets nicely. At $57, these were a steal and ended up working out great.

For the dining room, we went with three LBL Lighting Cypree Small Pendants because they looked elegant and didn’t obscure the view from the front door through the dining room window. While these look ok, we aren’t thrilled with them because they don’t light up the ceiling in the dining room enough. Since we don’t have any cans in the dining room, we really need a fixture that will radiate light in all directions, so sadly, these are probably going to have to be replaced. We are currently looking for a light that fits the bill so if any come to mind, let me know.

Finally, if you’re looking for the best places online to look for lighting, my vote goes wholeheartedly to LightingSale.com. Their selection is fantastic, their prices are almost always the cheapest, they ship quickly and inexpensively, and their service is great as well. Two thumbs up. We also ordered lighting from Arcadian and YLighting and had good experiences. In general, however, LightingSale.com takes the cake.

What’s next

Since all stages of construction are now documented, it’s time to start writing the wrap-up posts. There will probably be a couple of them. First up: a breakdown of the final costs. That will be coming shortly. I also need to stitch together the final time lapse. Soon.

Costs accrued during this stage:

Four kitchen pendants (lightingsale.com)$207.36
Three George Nelson Criss Cross pendants (ylighting.com)$1,077.00
Longer cords for Nelson Balls (Seattle Lighting)$26.83
8 Lite Source LS-19147 Olwen 3 Light Pendants (lightingsale.com)$835.92
LBL Lighting Cypree Small HS463 Dining Room pendants (Arcadian Lighting)$801.20