The Cabinet Package
One of the single biggest budget items of the house was the cabinet package. Custom cabinets are very expensive, no matter who builds them for you and what materials they use. If you’re looking to save a good chunk of change on your house project, cutting out the custom cabinets can go a long way. Short of custom, you can go with stock cabinets (like what you see at Ikea) or “semi-custom” cabinets, which are essentially pre-made but can have certain dimensions modified.
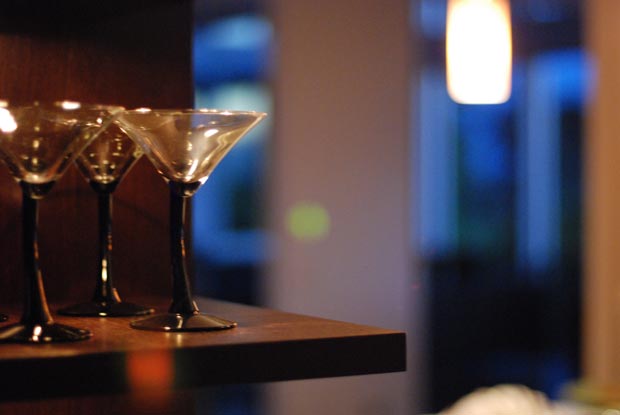
Open shelving at the end of the large kitchen cabinet makes for a nice glassware display.
I ended up spending $61,867.50 on my custom cabinets, and that included a fairly extensive ensemble in the kitchen, consoles in four bathrooms, a large dresser/armoire in the master bedroom, a full package in the walk-in closet, and a built-in desk for the office. This number could have easily been closer to $90,000 had I chosen a different cabinet maker, but could have also been closer to $20,000 if I went with stock stuff.
User interface around the house, in general, is a very big deal to me, and in the end, I felt that only custom cabinets would let me make the most out of the space and ensure that everything fit perfectly and provided easy access to the contents within.
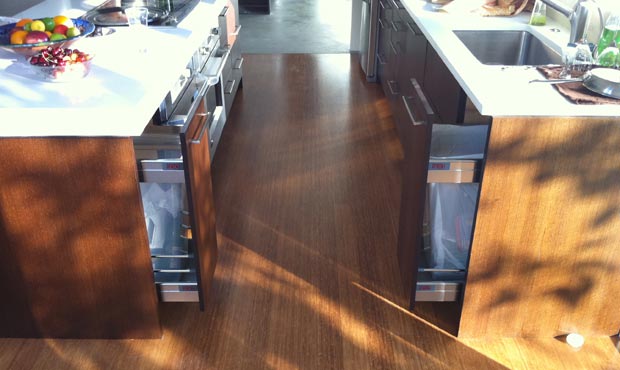
One of my favorite interface features: dueling trash and recycle drawers for easy access.
In general, we’re happy with how the cabinets turned out, from a design and usability standpoint, but there are some color inconsistencies and visible veneer seams that we feel could have been avoided if a different process had been used. The cabinet shop that designed and produced our cabinets uses a process called “spray finishing” which we knew nothing about before embarking on this project. Essentially, there are two ways to coat a cabinet: by staining it with a paint brush and stain or by putting each piece into a booth and spraying it with clear finish. This clear finish can be mixed with “tint” to help alter the color of the wood.
We specified espresso-colored cabinets from the beginning so we figured it would just be a question of laminating some rift-sawn oak to some plywood and then staining/spraying it a dark brown. We’d seen thousands of espresso-colored cabinets before so it didn’t seem like a complicated process. The shop began showing us sprayed samples and none of them looked right. They all looked more walnut-like in color than espresso-like. After going through probably 15 samples, the suggestion was made that we try a wood called wenge, which is a lot closer to espresso-color than oak. It’s a very hard African wood and it looked really nice to us so we said ok. The wenge ended up tinting pretty nicely and was close enough to espresso that we signed off on it.
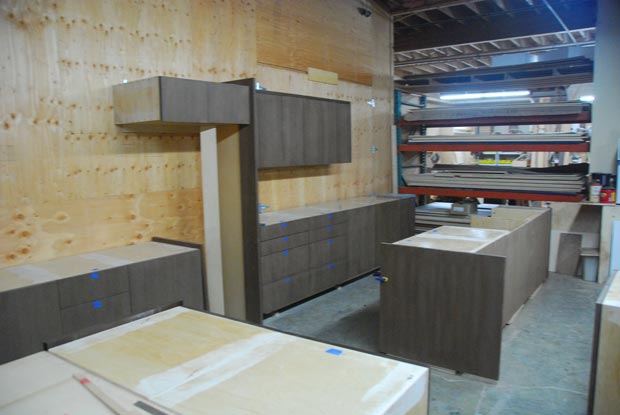
Here’s what the cabinets looked like in the shop, before finishing.
Unfortunately, a few months later, as the cabinets were installed, we noticed that the edge pieces were much darker than the faces. The reason for this is that the edges were made with wenge hardwood and not the thin veneer on the cabinet faces. The end result is sort of a “two tone” cabinet, in dark brown and much darker brown. To add to that, the color of the wenge varied from room to room and sometimes even board to board. Definitely not what we were expecting. Additionally, the porous nature of the wenge did not seem to take the spray finish evenly and needed touching up in multiple places.
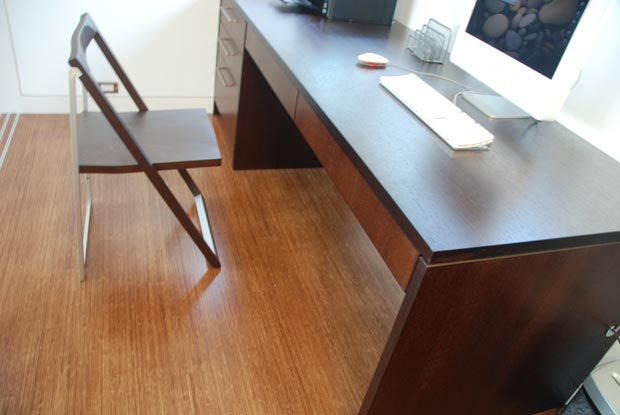
A very handsome built-in desk, but note the color difference between the surfaces.
There were several things we had the cabinet shop fix, and to their credit, they were very friendly and responsive about making things right, but the cabinet color was something that couldn’t be fixed without a complete redo. Given the fact that this color could conceivably be construed as intentional and it was extremely unlikely any visitors would ever notice anything was wrong, we decided to just live with them.
The color isn’t something that bothers us every day and we’ve pretty much gotten over the entire issue, but we did learn some lessons:
- Although spray finishing is, according to some, a high-end way to finish cabinets, do not try to radically alter the color of a wood with it. It should only be used when you are looking for a clear finish or perhaps go a shade darker. I wish the shop had apprised us of this.
- Do not use a wood that your cabinet shop has never used before. Woods vary tremendously in how they react to coatings and you don’t want any surprises in your project.
- Participate vigorously in the user interface design of your cabinets. Because we thought of things like where we want to toast our bread and where we want the garbage and recycle drawers to be, using the cabinets is a breeze.
- For areas like walk-in closets, consider building cabinets with both hanger bars and adjustable shelves built in. That way, you can fine-tune the amount of hanging and folding space to suit your clothing inventory.
- Know when to insist on fixes and when to let things go. Cabinetry is never perfect and if you insist on perfection, you’re going to end up making a lot of honest people redo their honest work.
Be sure to check out more photos of the cabinet package in the photo gallery.
Costs accrued during this stage:
| Cabinets | $61,867.50 |
Posted in Cabinetry | ![]() 10 Comments
10 Comments