Archive for the ‘Construction’ Category

Deconstruction Complete

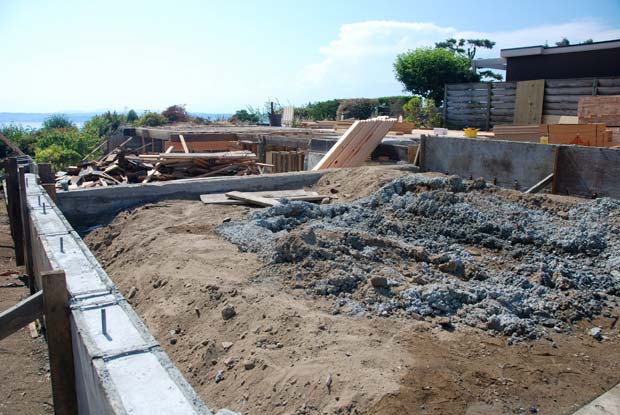
On July 23rd, deconstruction of the old house was officially completed. The process began on July 9th and took 8 business days (2 Monday-Thursday workweeks) to finish. I am completely satisfied and amazed at how this phase went, and I credit the great work of Noel Stout and his team at The RE Store as well as Paul Jensen Excavating for removing a 50 year old mass of brick, metal, wood, and sandstone with the delicacy of a surgical team.

A timelapse is worth a thousand words, so before explaining this phase any further, take a look at the whole process compressed down to about a minute:

Click to play timelapse

Probably the most amazing part about this deconstruction is how much material we saved from going into a landfill. I don’t have the final weight numbers yet, but essentially 40% of the house was resold to other home builders, 50% of it was recycled, and only 10% of it went to the dump. Amazing. For all the talk about building green using expensive solar panels and other technologies, this step has a much greater immediate positive environmental impact, in my opinion. I talked to Paul — the gentleman operating the excavator — and he told me he could have technically knocked the entire house down in five hours if it was all going to the dump. I ended up paying more in labor fees to deconstruct the house instead of demolishing it, but I would have paid more in dumping fees the other way. In the end, it’s better to spend your money on good, honest, environmentally-conscious labor than on dumping fees.

As an extra-added bonus, I had the re-sold elements appraised at Foss Appraisal and they came out to a whopping $18,000… about triple what I expected. This means I can write off $18,000 in donations from my taxes (note: any claim over $5000 requires this third-party appraisal).

The second-most amazing thing about this process was how little collateral damage was caused by it. One of my Japanese maples lost a branch due to a window frame falling and one of the neighbor’s garden rocks got cracked when a dumpster truck bumped into it, but that’s about it. To remove that much house off the side of a cliff with that little damage is astounding to me. The crews were all very nice too and entertained the neighbors with explanations the process.

Finally, the last amazing thing to me about this deconstruction was how freely everyone moved around in the presence of such dangerous machinery. In watching the livecam all day (I have an actual video feed on my desktop… not just the stills), I frequently saw people crossing in front of, behind, and on each side of the moving excavator arm without ever getting hit. The almost unconscious coordination these people have is unbelievable.
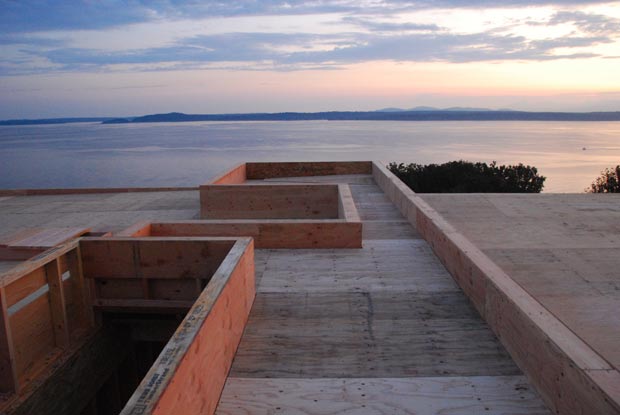
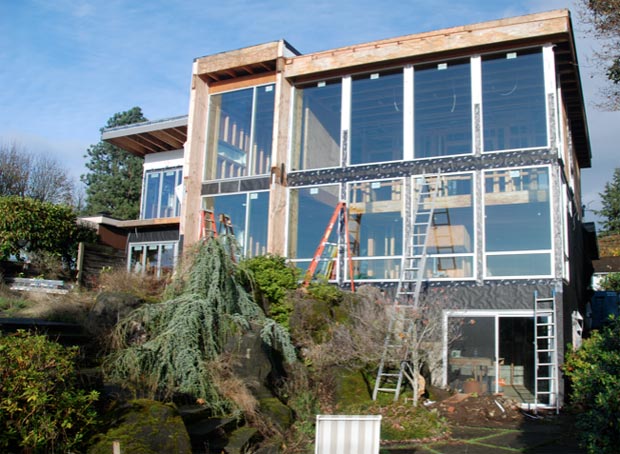
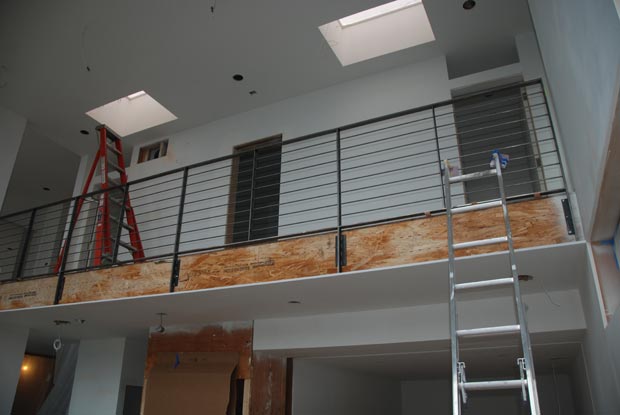
On to framing!

Costs accrued during this stage:

Miscellaneous excavation fees$270.00
RE-Store (deconstruction services)$18,611.69
Honeybucket rental$167.19
Appraisal fee for donated materials$270.00
Recycling/dumping fees$7,724.71

Garage Pour Complete

During deconstruction, it became apparent (via cracking) that the existing concrete carport was sitting on a few inches of air. Not good. Build decided, therefore, that it would be best to repour the garage foundation and footings at the same time we did some minor touch-up pouring around other parts of the foundation.

This phase was unexpected and added several thousand dollars to the cost of the project, but the folks at Blackhawk Concrete Construction, R. Leonard & Sons, Island Concrete Cutting, and Cascade Concrete Sawing ended up getting it done in only a few days, as framing began in other areas of the house.

There wasn’t a lot to see on the webcam for this phase of the process because the garage area is blocked by a big metal container, so it will be combined with the framing stage, for timelapse purposes.

A shot of the garage right before the new concrete was poured

Costs accrued during this stage:

Concrete pouring (Blackhawk)$14,447.95
Concrete and brick work (R. Leonard & Sons)$405.00
Concrete cutting (Island Concrete Cutting)$383.25
Concrete wall sawing (Cascade sawing)$443.48
Concrete slab sawing (Cascade sawing)$821.25
Special inspection for concrete epoxy work$450.00
Miscellaneous expenses$57.77

Framing in-progress. Photo gallery is live.

Just getting caught up on the last few blog posts worth of progress… sorry for the backdating on the last couple of entries.

Framing began a few weeks ago and it’s going QUICK. I’ll have a full post on the framing process next, but for now, feel free to check out the proper photo gallery of the entire project I posted last night. The gallery provides much better imagery and angles than the webcam, obviously, and I’ll update it as often as I can. It’s available via the left-hand navigation of this site as well.

I’m thinking about adding the photo galleries to the main RSS feed. Anybody have any thoughts on that? Good? Bad? Alternatively, I could just add the RSS feed of the gallery to the sidebar.

Framing is moving at breakneck speed

Framing began on July 23rd (only 28 business days ago) and it is amazing how quickly it’s going. Scott and the three man crew at Alexander’s Custom Homes, Inc. have been doing a spectacular job in all aspects thus far. They are diligent, detail-oriented, efficient, courteous to neighbors, and reasonably priced.

From what everyone tells me, this is the most interesting phase of construction to watch. Each day, the house looks much different, and it’s a joy to drive to the site after work and see what’s new.

On the downside, some dry rot was discovered in some of the existing basement framing we were going to re-use, so the crew had to tear that out and replace it. Not a huge deal, but not expected either. On the bright side, it makes me all the happier we didn’t decide to just remodel the house. Between the dry rot, the pipes, and the wiring, it was in pretty bad shape.

As the house takes shape, almost every area is looking really great. However, we’ve identified some areas of concern as well. Some have been dealt with gracefully by the shifting of non load-bearing walls, but one big item remains.

Problem #1 was that both of the additional bedrooms looked extremely small once the walls went up. We successfully remedied this by chopping the linen area out of the additional bathroom upstairs and giving the extra room to the bedroom. You can now comfortably fit a queen sized bed in there. We are now left with one small additional bedroom and one large additional bedroom, which sounds perfect.

Problem #2 was that at only 80 square feet, the master bathroom was small, and, in our minds, well below average by modern standards for a house like this. By shifting a couple of walls and reducing the size of the walk-in closet a bit, this was increased to a more comfortable 96 square feet. It’s not a giant master bathroom by any stretch, but it’s big enough for a shower, two sinks, a toilet, and a large jetted tub. We’re not looking to throw dance parties in there or anything.

Problem #3 is more serious in scope and deals with the size of the master bedroom. We’ll be looking at ways to resolve this tomorrow and I’ll have a separate post on it shortly.

In the meantime, please feel free to check out the latest photo gallery of the framing stage.

ceilingbeams

Framing complete. Sizing crisis averted.

After only five weeks, Scott and the three man crew at Alexander’s Custom Homes have successfully completed framing of the house. They will be back to install the windows and several other things later, but the bulk of their work is done… and done extremely well.

Here is the timelapse of framing phase:

Click to play timelapse

I mentioned in my last post that we encountered a few sizing “issues” during framing, two of which were solved by minor shifts in interior walls, and one of which was unsolved.

The unsolved issue centered around the feeling that, at less than 12 feet, the master bedroom was too shallow. While 12 feet is a perfectly livable depth for a bedroom, it just seemed too cramped, especially for a house designed from scratch for its owner. The girlfriend and I both felt the entire master suite was just too small so we asked Build for options, priced out. The options were:

  1. Move the entire exterior west wall of the master bedroom two feet west, enlarging the bedroom depth by two feet and shrinking the deck depth by two feet. This seemed like the most attractive option, but it was also by far the most difficult because it posed far-reaching structural problems. Turns out we would have had to re-beam a good portion of the house all the way from the north to the south. Approximate cost: $14,000.
  2. Same thing as above but move the wall six feet west instead, to the edge of the deck, eliminating the deck. This was a lot easier structurally, but losing the master bedroom deck did not seem good. Approximate cost: $10,000.
  3. Move only the section of the west wall that is glass two feet west, leaving the structural part of the wall in place. This poses no structural issues, shrinks part of the deck to a 4 foot depth and leaves the other part at a full 6 feet. Approximate cost: $1,500.
  4. Steal a foot from the already small master bathroom and walk-in closet. Approximate cost: $500.
  5. Do nothing. Cost: only disappointment.

After some heavy thinking, option 3 arose as the clear winner. It accomplished the objective of enlarging the master bedroom, didn’t cost too much, and it even improves the deck in a way, since the six-foot-depth area is a bit more private now.

So, sizing crisis averted!

There are a few very important things I learned from this process:

  1. I can’t stress how relieving it is to have a design/build firm whose interests are completely aligned with mine and who isn’t interested in nickel-and-diming me for every little change order that comes along. With many traditional architects and G.C.s, even meeting about such a change would “start the meter” so to speak. Build has been great through all modification requests and I feel very lucky to have a team that cares as much as they do.
  2. Not withstanding the above, I am a bit mad at myself for not doing more during design stage to ensure the house was sized appropriately. In looking at plans, I tended to concentrate on the more obvious questions like “where is the kitchen in relation to the living room and dining room” and “how many bedrooms are on the same floor at the master”. I really never scrutinized actual dimensions of rooms because I just figured there was a standard size for everything that would be either met or exceeded. What I should have done is physically laid out string in an open space somewhere to match the dimensions of each room in the house. Just a quick “reality check”. This lesson gave me a great idea for an invention/business that I may pursue at some point. The bottom line, however, is that it doesn’t matter who your architect is… they are going to design what they think works and if you don’t have the data to know otherwise and say something, you’ll end up with questions and change orders.
  3. In this phase of the project, I will freely admit that I have gone from a “low to medium maintenance” client to a “high maintenance” client, and I think I know why: I am a web designer. My world is not a world in which I spend months planning things with the intent of building them out to the meticulous specs of the plan. My world is a world in which you have an idea, mock something up, prototype a little, iterate, launch, and then keep iterating after that. The foundation is never set, the walls are never nailed, and the paint is never dry. Working on the web is an infinitely iterative process and designing a house is the opposite of that.

Costs accrued during this stage:

Lumber$10,732.24
Lumber$25,656.30
Lumber$1,605.84
Honeybucket rental$117.19
Structural engineering services$232.50
Structural engineering services$155.00
Structural engineering services$775.00
Printing/Reprographic fees$27.00
Framing supplies$1,774.59
Framing supplies$380.65
Framing supplies$714.93
Framing labor$4,565.87
Framing labor$27,813.40
Framing labor$5,412.38
Framing labor$5,625.25
Wood debris hauling$1,089.00
Fence Rental for 6 months$438.00

Plumbing and HVAC rough-ins complete

The plumbing and HVAC rough-in work is now essentially complete and electrical work has begun. Details of the plumbing and HVAC equipment are available at this previous post, but essentially, the piping, the ducting, and the gas furnace are now all installed. Lots of other stuff, like the heat pump and the fixtures come later.

The crew at Anderson Nesler has done a great job on the HVAC, building an intricate but efficient maze of ducting, and cramming the furnace into a tight crawlspace so as to minimize impact on livable area.

Costs accrued during this stage:

HVAC rough-in$20,268.56
HVAC rough-in$5,791.02
HVAC rough-in$2,895.51
Plumbing rough-in$1,341.38
Plumbing rough-in$8,048.25
Plumbing rough-in$8,815.92
Sewer line video inspection$130.80
Honeybucket rental$117.19

Choosing a deck surface

So far, none of my house-building research has yielded more negative information than deck construction. Everyone seems to hate their deck. People who have wood decks complain about having to stain them every year or two, and people who have composite decks complain about the material not being maintenance-free at all.

I’ve researched no fewer than 10 brands of composite decks and also looked into ipe and cedar, and there just doesn’t seem to be a clear winning option. It’s all about tradeoffs. The one thing I’ve decided I definitely don’t want, however, is a faded (“silvered”) deck. Some people like the weathered look. I don’t. Therefore, ipe is unfortunately eliminated. It’s a shame too because ipe is generally regarded as the most durable wood one can buy. Unfortunately, however, ipe is so dense that it doesn’t take stains or protectants very well, so it is recommended you just leave it alone and let it fade to its natural patina. No thanks. I’ve heard of people using a product called Penofin to keep Ipe brown, but treatment must be frequent and results seem to vary.

Cedar is the other wood to consider, and while I think it would provide the best looking deck out of any of the options, it would require the greatest amount of maintenance, and I’m not sure I want to sign up for that.

From there, we get into the composites. Trex is the best known name in composite decking, but it’s also the company that receives the most negative reviews and has been successfully sued for misrepresenting the quality of its product (actually, they settled out of court, but whatever). After Trex, there are a slew of companies selling their own variation of a composite deck, each one made with slightly different materials and esthetics in mind.

This is allegedly what a Trex deck looks like. In reality, it is significantly less impressive.

I found it next to impossible to find objective, scientific studies comparing deck materials, but it turns out Consumer Reports did a reasonable study on the subject recently. By the way, if you’re building a house, buying an online subscription to Consumer Reports should be one of your first expenditures. The study took many different brands and exposed them to sun, wind, and rain over the course of several years. The results varied wildly, with some decks holding up admirably and others literally disintegrating to pieces. The material which came out on top is called Symmatrix by Dow Chemical. To my surprise, however, I found out the product has been discontinued, despite its great rating. Unbelievable… and a bit suspicious, to be honest. Why would a seemingly great product be abandoned by its producer? If anyone knows, please post in the comments.

The only other brand that scored nearly as well in all of the areas important to me was something called Timbertech. It’s especially good at mildew resistance, and that’s key. Unfortunately, Kevin at Build brought me a sample of it today (along with some Trex), and it has a fake grain texture to it that seems a bit chintzy. I may look at some more samples, but this particular one didn’t look great.

Here is the concerning part though: do a Google search for Timbertech, Trex, or any other brand of composite decking and you’ll see loads and loads of very detailed complaints. The ratio of haters to lovers seems troublingly high. It’s enough to make you want to ditch the idea of planks altogether and go with concrete pavers or something.

I’m not sure where I’ll end up yet, but I’d say so far, I’m favoring Trex, then Timbertech, and then cedar. Would love some first-hand opinions from anyone who has their own deck, so if you have one (a deck or an opinion), please feel free to post your thoughts below.

Incidentally, the best article and discussion I found on the subject was from Fine Homebuilding Magazine.

All sealed up

It’s been raining like the bejayyyyysus in Seattle over the last week or so, but thankfully, the majority of the house has been sealed up just in time. Last week, the framing crew at Alexander’s Custom Homes along with Build themselves, installed the following:

The largest of the Marlins weigh 350 pounds and measure approximately 9 feet by 9 feet. Unfortunately I wasn’t there to film the action, but from what I understand, it took a crew of seven to jostle some of these giant glass forms into place. I find it amazing that not a single pane was damaged or dropped.

I know I routinely say good things about Build, but when a four man design/build shop shows up on site to help physically install 350 pound windows, that is pretty special… and these guys aren’t exactly Lou Ferrigno either (check out Kevin’s arms). They also saved me a ton of money when some of the windows showed up unexpectedly unglazed due to their weight. Calling a full field glazing team in to remedy the situation would have cost several thousand dollars, but because Build provided additional sweat equity, two field glazers were able to install everything in a few hours.

For some specifics on all the glass, read on…

The windows

The State of Washington made things very easy on me, decision-wise. If you have a two-story space to glaze and you specify aluminum frame windows, there is exactly one kind of window which meets the Washington Energy Code: the Marlin 1505 Series. While this is not good from a “shopping around to get the best value window” standpoint, it’s good in that it’s one less decision to make.

Energy codes are a controversial subject. Especially in states like Washington and Oregon, some people say the codes are so strict that they dramatically increase the price of construction without proportionate reduction of energy footprint.

The Marlins have a U-value of 0.35 which is right at Washington’s limit. Smaller inoperable vinyl windows can get down to 0.15, but who wants a bunch of small, inoperable vinyl windows on their house?

The windows were supplied by Goldfinch Brothers out of Everett, WA and Marlin themselves are a Spokane, WA company so it was nice to buy local.

I will not be throwing stones anytime soon.

The NanaWalls

The Nanas are one of my favorite elements of the house. A NanaWall is essentially a sliding glass door that folds away like an accordion instead of sliding. The upshot of this is that the entire passageway can be opened, unlike a sliding door which is never really more than halfway open at any given time. Another nice feature of NanaWalls is that the first pane swings outward like a standard door so you can open and close it with ease. NanaWalls are especially good choices when you are trying to seamlessly connect outdoor space to indoor space, as I doing with my patio and north kitchen area. They are a little more expensive than Fleetwood sliding doors but worth it, in my opinion.

Yes, there will eventually be a safety rail and a proper deck here.

The Milgard sliders

NanaWalls notwithstanding, there were still a couple of spots that needed standard sliding doors: the basement and the dining room. When you look at Milgard sliding doors, “standard” is about the only word that comes to mind. Inexpensive and unremarkable. Kind of like anything from Old Navy.

Motorized skylights

As you can probably tell, the house isn’t exactly starved for light, but in the summer, it is critical that it has proper ventilation. In order to suck cool air in and draw hot air out, we made part of the lower west glass operable and installed two motorized skylights at the top of the double-height great room.

The skylights will be tied into the Myro home automation system as well as open and close in reaction to heat and rain.

The roof hatch

What can I say. It’s a big ugly steel hatch leading up to the roof deck. Roof access is rarely a pretty thing and this is no exception, but it gets the job done with as small of a footprint as possible.

What’s next

Now that the house is 95% dry, the space around the window frames will be waterproofed this week and the entire house will be sheathed in waterproof fabric. Once the house is all covered, the rainscreen paneling and metal roof will be installed. There should be lots of progress on the livecam for the next two weeks.

I’ve also update the gallery with shots of all the new glass.

Costs accrued during this stage:

Marlin windows and Milgard doors$47,052.15
NanaWalls (parts)$16,554.00
NanaWalls (deposit for install)$739.13
NanaWalls (remainder for install)$739.12
NanaWall Screens$2,978.00
Bilco roof hatch$5,489.56
2 Motorized skylights$2,414.48
Distinctive Windows, Inc. (field glazing)$525.60
Precision Fabricators (flashing)$657.06

Roofing complete. Doors are on.

Upon returning from a two week vacation in Peru and the Galapagos Islands a week ago (which was awesome), I was pleased to see all of the progress that was made in my absence. The roof is all done, the siding is beginning to go up, insulation is in, the drywall is being hung, and best of all, the big metal container that’s been in front of the house partially obscuring the livecam is gone!

Roofing

The house has four roof surfaces: the south roof, the north roof, the roof deck between those two roofs, and the garage roof. The north roof and the garage roof are standing seam shed roofs in a warm grey tone. The roof deck will be clad with Trex Brasilia espresso synthetic wood decking. I feel pretty good about these three surfaces.

The only roof I’m still not quite feeling is the south roof. It’s almost flat so it wasn’t a good candidate for standing seam metal, so we went with a white single membrane surface. The white doesn’t look great but at least you can only see it from the roof deck. On the bright side, you can easily walk on the roof and it will also be easy to install solar equipment — which I’ve pre-wired for — when the economics make sense. My main concern with this roof is how the edges look from the street. The edges require a noticeably different treatment than the edges on the shed roofs, and I’m just not feeling the gestalt yet. The plan is to edge the south roof with the same Cembonit cement board panels we’re using on the rest of the house. We’ll see how it goes. I’m reserving judgement until the siding is up and I can see how everything meshes together.

My roofing contractor is Nate Dowers Construction and they have done a bang-up job so far.

UPDATE (5/1/2010): We decided to turn the south roof into a matching standing seam metal one after all. It cost us a few thousand dollars more but it looks better and should last longer than the membrane version. Looks great!

Doors

There are a few different types of doors in this house:

  • Solid-core interior hinged doors
  • Solid-core interior pocket doors
  • Raumplus glass sliders (for laundry, office, and media rooms)
  • Standard exterior hinged doors
  • Huge, super-awesome front doors

So far, everything except the Raumpluses have been installed. The hopefully interesting details are as follows:

  • We ended up going with the Linnea Pocket door locks and they aren’t as bad as I feared. Quite acceptable really, as far as pocket door interfaces go.
  • For the standard interior doors, we went with Karcher Cyprus handles. They are clean looking and feel good on the palms.
  • For the huge, super-awesome front doors, we went with a double-door made of fir veneer. Veneer is apparently much stronger and more resistant to warping than solid wood so that’s what people usually go with these days. The doors are almost nine feet tall. They feel majestic. We’re waiting until the siding and a few other details are done before picking the exact stain color. Some people might choose aluminum framed glass doors for a house like this, but for some reason, I just feel like a house should have wooden doors. Aluminum with glass feels too much like a retail space to me.
  • For the front door hardware, we’re going with the Omnia Urban which looks sharp and meshes nicely with the NanaWall hardware.

Scope additions and shifts

Several items related to carpentry, installation, and various other areas of labor have been shifted in the budget from subcontractors to Build as they’ve taken tasks on themselves. I’m happy to have team Build tackle this stuff because of the high level of work they’ve exhibited so far. Additionally, we’ve added $4000 to the construction management budget — bringing it to $99,000 — to cover a lot of the extra coordination that is going into this project. I’m happy to increase the construction management fee modestly in this way as I feel I’ve gotten plenty of value for the money.

Costs accrued during this stage:

Nate Dowers Construction (roofing labor and materials)$37,008.92
Additional material to convert south roof to metal$2,715.00
Compton Lumber & Hardware (doors)$11,337.39
Builders' Hardware & Supply Co, Inc (door hardware)$2,394.94
McMaster Carr (closet door pulls)$121.64
Miscellaneous expenses$2,007.89
Printing fees$268.65
Honeybucket rental$117.19
Build LLC (various installs, carpentry, doors, labor, etc.)$7,532.50
Build LLC (additional construction management fee)$4,000.00
Gale Contractor Services (insulation)$4,561.78

Drywall is complete

Thanks to Israel Avalos and the hard working crew at PJJ Construction, drywall work is now complete. The crew will be back to fix any damage caused by ongoing construction, but as of last week, all drywall is hung, taped, and mudded, and it looks great. Israel’s crew has done such a good job over the last two months since drywall work began that we are using them for a good amount of interior carpentry as well.

There isn’t a whole lot of detail to discuss about the process of hanging drywall, but we ended up going with a mix of “level 4” and “level 5” drywall around the house. Level 4 drywall installation essentially means that the finish is smooth, seamless, and fit for display in most public areas around the house. If you had an area you wanted to cheap out on like a basement laundry room, you might go level 3 there, which wouldn’t be as nice of a finish. Level 5 finish, on the other hand, is designed for areas with particularly harsh lighting conditions like huge art walls that are exposed to the sun. In a level 5 finish, the entire wall is skim-coated before it is primed. Since we have a lot of large walls that are heavily exposed to the sun coming off the water, all of these areas got the level 5 treatment.

There’s a gallery of some of the drywall pictures here.

Costs accrued during this stage:

PJ Construction (drywall)$22,353.00
Dehumidifier rental$1,017.39
Honeybucket rental$117.19
Take It Away Hauling$490.95
Miscellaneous expenses$937.81