Archive for the ‘Energy’ Category

Heating and Cooling Plans Take a U-Turn

Sarah Palin

Turns out we’re actually not going to Drill Baby Drill.

A couple of weeks ago, in the midst of wrestling with some difficult cost-cutting decisions, Build and I met with an energy consultant to discuss the viability of equipping the new house with technologies like geothermal and radiant heat. My hope was to use both, in an attempt to be as green and comfortable as possible.

I had been told by a couple of local drilling companies that I probably only needed three 300-foot holes drilled, at $5000 apiece, to generate enough load to both heat and cool the house. Although $15,000 is a lot of money, it seemed like a good investment and the right thing to do, from an environmental standpoint.

To my dismay, however, the consultant was pretty sure I needed five holes, considering how many windows I have, and that the total drilling bill would be more like $30,000. If I was under budget or close to it, maybe I would have still considered it, but since I’m still substantially above where I want to be, it made sense to say goodbye to geothermal heat, unfortunately. I get the feeling this happens to a lot of people; swearing to use as many clean technologies as possible and then shuttering many of them along the way as costs begin to spiral. I look forward to the day when the cost of building green is not significant enough to even notice. That being said, building green is not an all or nothing proposition. Just because I’m not plunking down $30,000 for a fancy geothermal system doesn’t mean the house won’t be energy-efficient in many other ways.

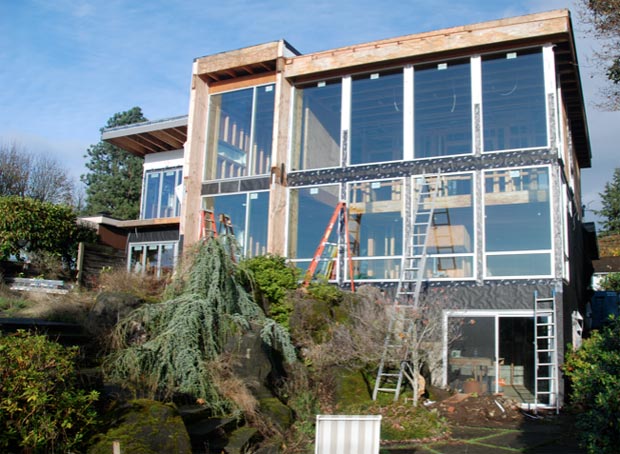
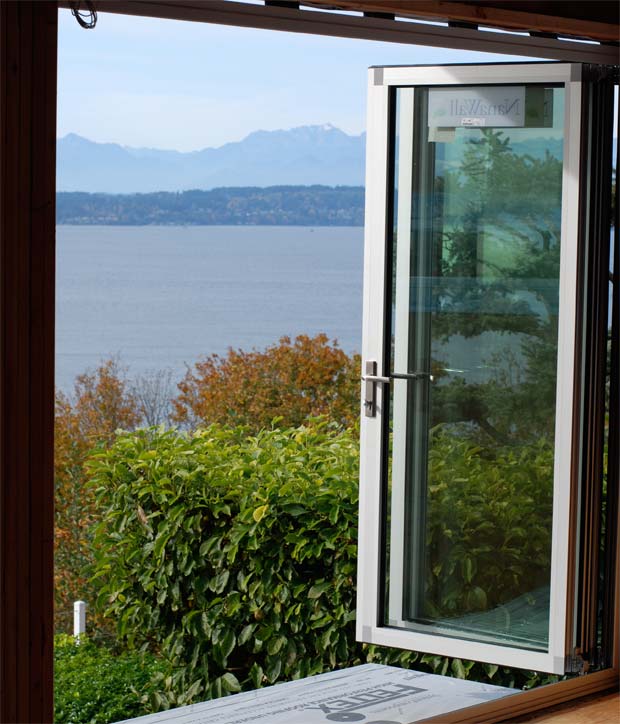
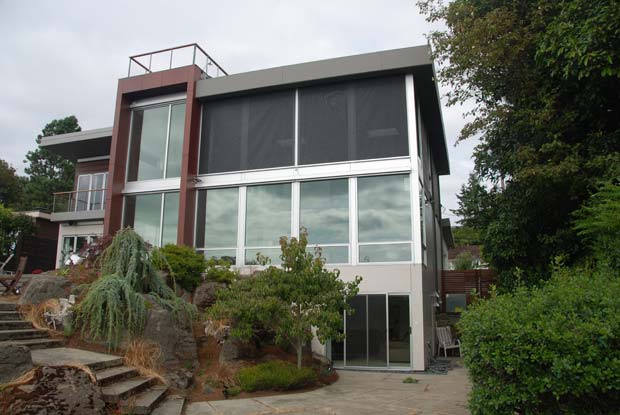
The next decision revolved around radiant vs. forced air HVAC. Going into this meeting, I didn’t even think forced air would be on the table, as many people have told me that radiant heat is far superior. The problem, however, with radiant is that there is no built-in cooling. There is a “comfort system” they can build these days which runs cold water through the radiant pipes but it’s not really capable of cooling the house by more than a few degrees. Given the fact that so much of the west side of the house is glass and will transfer a lot of heat from the sun, it seemed necessary to have a full-fledged air conditioning system for those (admittedly rare) sweltering Seattle summer days.

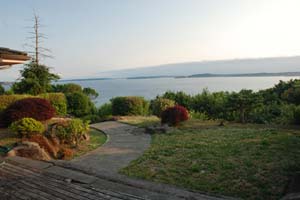
Could we try and design a house which used breezes off Puget Sound to cool the house in the summer? Sure, but if it didn’t work so well, retrofitting for air conditioning would be difficult and expensive. Given that, the project now required full ductwork for a forced air A/C system. And given that, we were now talking about two totally separate systems for HVAC: radiant pipes for heat and forced air for A/C. Expensive, and arguably overkill.

On top of these complications, the energy consultant also warned me that radiant heat is not nearly as fast as forced air at changing the temperature of a house or a zone in the house. Radiant can take 2-3 hours to do its job while forced air is more like a matter of minutes. While this usually isn’t a big deal because most people keep their house at a relatively constant temperature, my house may present a difficult challenge because of all the west-facing glass (this is becoming a theme, I am noticing): on a cold, clear winter morning, it may be 30 degrees outside and the heating system would probably be cranking. But as soon as the sun hits the west glass in the afternoon, that could warm the house up naturally quite a bit. At that point, the heating system needs to ease up a bit. And then when the sun goes down, it needs to crank back up. Radiant heat is simply not as good as forced air for quickly adjusting to these sorts of things. And on top of that, radiant heat does not work perfectly under wood floors. It’s generally best under concrete, slate, or tile.

So anyway, with all of that to consider, I made the call to move forward with a natural gas powered forced air heating and cooling system. I may do a mini radiant heating pad to warm up the master bathroom tile, but that’s it. On the downside, it’s not as forward-thinking of an HVAC system as I was hoping for, but on the upside, it should be more comfortable, and it saves me probably $40k-$50k in total.

The Cost of Heating a Hot Tub

How much do you think it costs to keep a hot tub heated at 102 degrees year-round, non-stop, with the built-in electric heating system that come with today’s models? Formulate your answer and then scroll to the bottom of the picture for the answer.

According to a newly hot-tub-owning co-worker of mine and his wife, about $14 a month. That is much, much cheaper than I would have expected, and apparently it’s a lot cheaper than it was with the less efficient models of yesteryear. My guess was about $50 a month, and I assumed one was supposed to keep it cold until an hour or two before one wanted to use it. $14 a month for an ever-ready tub seems incredibly efficient. I think it has something to do with how well the cover insulates the tub when it’s not in use.

Thinking About Induction Cooking

It took a well-placed comment from The JimRay™ in my last post, but induction cooking is beginning to look very interesting to me.

Check out this illustrative image from GE showing ice cubes sitting calmly on one side of an induction burner and a half-pot of boiling water on the other:

You don’t know how many times I’ve wanted to set ice cubes randomly on a burner.

Anyway, induction cooking is more than just an impressive technology for party tricks. It heats pots faster than even gas and expends less energy doing so… all via the power of magnetic force. The chief downside appears to be that you need to use iron or steel cookware, which isn’t a big deal to me since I only own a few pots and all are magnetic. The other downside is that I haven’t found a model which includes any sort of built-in griddle, which kind of sucks.

For more information on induction cooking, check out GE’s Induction Cooking site. It looks like you can get models ranging from about $1000 to several thousand, depending on what you’re looking for.

Anyone have any experience with induction cooking? Is it all it’s cracked up to be?

All sealed up

It’s been raining like the bejayyyyysus in Seattle over the last week or so, but thankfully, the majority of the house has been sealed up just in time. Last week, the framing crew at Alexander’s Custom Homes along with Build themselves, installed the following:

The largest of the Marlins weigh 350 pounds and measure approximately 9 feet by 9 feet. Unfortunately I wasn’t there to film the action, but from what I understand, it took a crew of seven to jostle some of these giant glass forms into place. I find it amazing that not a single pane was damaged or dropped.

I know I routinely say good things about Build, but when a four man design/build shop shows up on site to help physically install 350 pound windows, that is pretty special… and these guys aren’t exactly Lou Ferrigno either (check out Kevin’s arms). They also saved me a ton of money when some of the windows showed up unexpectedly unglazed due to their weight. Calling a full field glazing team in to remedy the situation would have cost several thousand dollars, but because Build provided additional sweat equity, two field glazers were able to install everything in a few hours.

For some specifics on all the glass, read on…

The windows

The State of Washington made things very easy on me, decision-wise. If you have a two-story space to glaze and you specify aluminum frame windows, there is exactly one kind of window which meets the Washington Energy Code: the Marlin 1505 Series. While this is not good from a “shopping around to get the best value window” standpoint, it’s good in that it’s one less decision to make.

Energy codes are a controversial subject. Especially in states like Washington and Oregon, some people say the codes are so strict that they dramatically increase the price of construction without proportionate reduction of energy footprint.

The Marlins have a U-value of 0.35 which is right at Washington’s limit. Smaller inoperable vinyl windows can get down to 0.15, but who wants a bunch of small, inoperable vinyl windows on their house?

The windows were supplied by Goldfinch Brothers out of Everett, WA and Marlin themselves are a Spokane, WA company so it was nice to buy local.

I will not be throwing stones anytime soon.

The NanaWalls

The Nanas are one of my favorite elements of the house. A NanaWall is essentially a sliding glass door that folds away like an accordion instead of sliding. The upshot of this is that the entire passageway can be opened, unlike a sliding door which is never really more than halfway open at any given time. Another nice feature of NanaWalls is that the first pane swings outward like a standard door so you can open and close it with ease. NanaWalls are especially good choices when you are trying to seamlessly connect outdoor space to indoor space, as I doing with my patio and north kitchen area. They are a little more expensive than Fleetwood sliding doors but worth it, in my opinion.

Yes, there will eventually be a safety rail and a proper deck here.

The Milgard sliders

NanaWalls notwithstanding, there were still a couple of spots that needed standard sliding doors: the basement and the dining room. When you look at Milgard sliding doors, “standard” is about the only word that comes to mind. Inexpensive and unremarkable. Kind of like anything from Old Navy.

Motorized skylights

As you can probably tell, the house isn’t exactly starved for light, but in the summer, it is critical that it has proper ventilation. In order to suck cool air in and draw hot air out, we made part of the lower west glass operable and installed two motorized skylights at the top of the double-height great room.

The skylights will be tied into the Myro home automation system as well as open and close in reaction to heat and rain.

The roof hatch

What can I say. It’s a big ugly steel hatch leading up to the roof deck. Roof access is rarely a pretty thing and this is no exception, but it gets the job done with as small of a footprint as possible.

What’s next

Now that the house is 95% dry, the space around the window frames will be waterproofed this week and the entire house will be sheathed in waterproof fabric. Once the house is all covered, the rainscreen paneling and metal roof will be installed. There should be lots of progress on the livecam for the next two weeks.

I’ve also update the gallery with shots of all the new glass.

Costs accrued during this stage:

Marlin windows and Milgard doors$47,052.15
NanaWalls (parts)$16,554.00
NanaWalls (deposit for install)$739.13
NanaWalls (remainder for install)$739.12
NanaWall Screens$2,978.00
Bilco roof hatch$5,489.56
2 Motorized skylights$2,414.48
Distinctive Windows, Inc. (field glazing)$525.60
Precision Fabricators (flashing)$657.06

Mitigating Solar Gain with Motorized Shades

The shades from outside the house. Only the uppers are down in this shot.

Given that the house faces Puget Sound to the southwest and the view side is almost completely glass, it was of utmost importance to engineer a sun management strategy that allowed the house to stay as cool as possible in the summer and as warm as possible in the winter.

For sun control in this situation, there are a few things you can use: long eaves which help shade your windows when the sun is high in the sky, interior shades which block solar rays from hitting your interior surfaces, or exterior shades which block the solar rays before they even hit your windows. The eaves were a given as they fit with the style of the house, but the shades were a very long project in investigation and implementation. The great thing about interior shades is that many different brands are available and you can use them year-round no matter what the conditions are like outside. The downside, however, is that your glass still gets very hot, so they are less effective at keeping rooms cool. The great thing about exterior shades is that they block upwards of 90% of the sun’s energy before it even hits your glass so they are excellent at keeping things cool. However, since they are exposed to the elements, they must be retracted during high winds (of which we get plenty).

Since eliminating heat in the summer was our top priority, we chose exterior shades from Somfy. Somfy is the only company that makes motorized exterior shades that tie nicely into most home automation systems. It would have been nice to have our pick of brands since there is a lot about Somfy I don’t particularly care for (like the fact that they use an old school serial interface), but since they were the only game in town, we went forward with them.

The most difficult part, however, was picking which Somfy system to use. They have a system called RTS which uses easy wireless controls, but the blind motors are “dumb” and can’t give the system status on their position. They are also either “fully up” or “fully down”. You can’t send a command to a blind telling it to move to 10% up at 10am and then 20% up at 11am, etc etc.

The other, newer system is called ILT. These blinds report their positions to the automation system and also can respond to the sort of incremental commands mentioned above. The downside of the ILT system, however, is that it uses a wired serial interface. Somfy just released a wireless Z-Wave interface but it came out too late for us to use it. The Z-Wave interface was supposed to come out last January and we had planned our project around it, but Somfy kept stringing us along on the release date and it didn’t end up coming out until our blinds were already being fabricated. This was extremely maddening as it caused us to run more wire through the house, purchase more equipment from Somfy, and end up with a system that was not Z-Wave aware.

Another maddening thing about the system is that while older Somfy motors like the RTS have an integrated sun and wind sensor that can automatically retract blinds during periods of high wind, the ILT offers no such sensor. Instead I’m in the process of rigging up a Davis Weather Station on my roof that can report weather conditions back to the home automation system, which will then in turn raise and lower the blinds automatically. Yes I know, it sounds like total overkill.

Even though I’m generally very happy with the blinds now, I will admit that I probably overthought the situation a bit. I was under the impression that when the blinds were down, you would barely be able to see out the windows. For this reason, I wanted to do things like incrementally raise and lower the blinds throughout the day according to sun angle. I basically wanted to only lower the blinds as much as necessary at any given time.

As soon as I lowered them for the first time, however, I was shocked at how little they obstructed the view. They are so transparent that sometimes you can’t even tell they are down. Had I known this from the outset, I might have just gone with the RTS setup and not worried about precise blind positions. Long term, I’ll probably be happier with these as I can do things like detect when a window is open and only lower the blinds to the top of that window, but still, the many hours of research and work to get this system into place were not as necessary as I originally thought.

As you can see, there’s virtually no reduction in view when the blinds are down.

While Somfy has been extremely spotty in providing support for my project, my other two partners on this project were great: Atrium Shade fabricated and installed the shades and my buddy Danny Mavromatis of Myro did all the ridiculously cool and complicated home automation tie-ins. Atrium provided the shades (as well as other interior shades throughout the house) at a very reasonable price and Danny expertly enabled me to do things like raise and lower them from my iPhone or any other IP-connected location.

Costs accrued during this stage:

Shades - Interior and Motorized Exterior (Atrium Shade Company)$24,080.43