Archive for the ‘Metalwork’ Category

Interior metalwork is complete

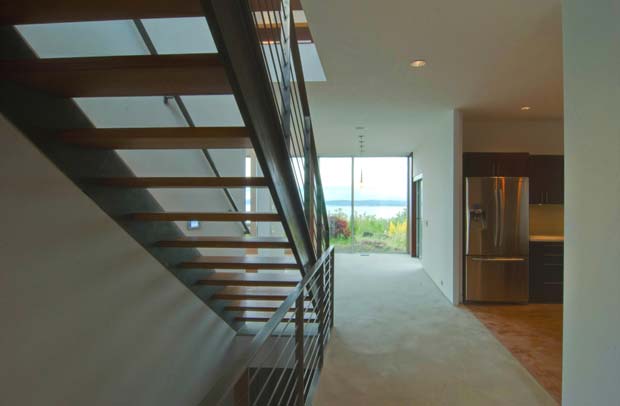
Although there are still exterior awnings and deck railings to fabricate, all of the interior metalwork is now complete. Thanks to the precise skills of Pacific Northwest metal master Olda Zinke, I now have interior steel railings all around the house that look like this:

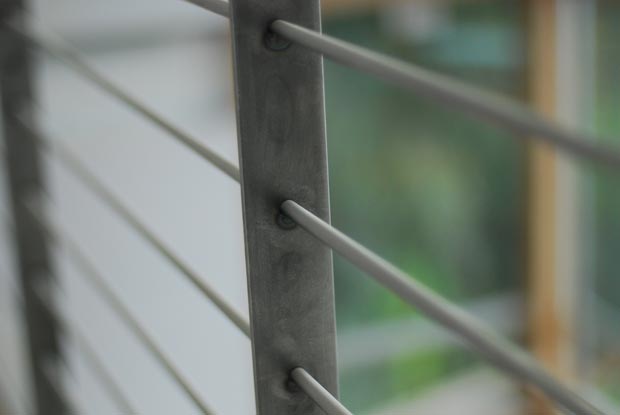
The railing above is from the catwalk, and there are also rails lining two flights of stairs. Photos of those are available in the gallery. It’s a bit unfair to Olda to show these photos at this stage because the railings are still dusty and the stair treads are only temporary (homemade thick bamboo treads will be going in shortly) but I’ll post plenty more shots when everything is all cleaned up and fully fabricated.

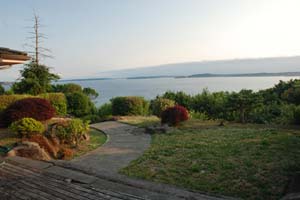
If you look through the shots in the gallery, you’ll notice that the stairs are made with one hot-rolled steel stringer on each side attached to the cold-rolled steel railings. This was a bit of a surprise to me as I was expecting a single steel beam down the middle supported the treads from the center. The communication between Build and me could have been a lot better here, but in the end, I think the two stringer system may be a better overall look, especially considering one is recessed into the wall, providing a nice viewport through the treads to the panaromic view behind them.

Costs accrued during this stage:

Interior metalwork (Olda Zinke)$21,765.86
Metalwork delivery charge (Pacific Delivery Service)$316.91

Offing the Awning

Every so often, a design element just doesn’t end up looking good. Such is the case for the galvanized steel awning that went up above the front door. There are a few things wrong with it, in my opinion, but of course, this is all subjective:

  • The galvanized steel just doesn’t go with the rest of the house and is too industrial looking.
  • The scale does not look right. It’s neither as thick as the elements around it, nor as thin as some of the aluminum details near it. It also seems like it should span all the way across the box.
  • It doesn’t provide a mechanism to cleanly conceal lighting which should inconspicuously light the front door area.

Sometimes when less-than-ideal elements go up, you can make a few tweaks here and there to salvage the situation, but I think this was just a clear (and rare) case of a design miss. Build is working on some ways to keep the steel structure up to provide stiffness and wrap it with a different material, like aluminum or fir, whilst providing a means to conceal puck lighting inside.

My lesson from this is to stand strong against materials you don’t particularly care for. I’ve never liked galvanized steel and underestimated the effect it would have on the front entryway. I’m sure things will work out fine but this is a misstep I would have rather avoided.

The new awning and front stairs are complete

We’re in hopefully the last week of work right now, as various punchlist items get taken care of and we get ready to move in. One item I discussed several weeks ago in “Offing the Awning” was the poor appearance of the front canopy. I’m happy to say that this has now been successfully resolved and we have a beautiful new canopy in front which ties in much more tightly to the overall design of the house:

The fir from the canopy, door, and stairs now tie together beautifully.

The puck lighting underneath the canopy provides just the right amount of light to illuminate the wood.

The fir stairs provide a warm entrance and the aluminum underneath offers a minimalist support structure.

Overall, I’m extremely happy with the finished product. This is one of a handful of items we pushed back on very hard from a design standpoint, and although it felt stressful and unsatisfying at the time, I’m really glad we insisted on this refined approach. It cost me a few thousand dollars in the end, but since we’re still using the steel frame of the original canopy inside of the aluminum/fir casing, it’s still providing some value. UPDATE: Kevin from Build pointed out to me that although the finished cost of the canopy is more than originally spec’d, not a penny of the cost was actually wasted due to the fact that the steel frame is simply acting as the skeleton now. Fair point.

Not to be overlooked, the fir stairs are also the result of pushing back against a proposed solution (steel) that we never got comfortable with. The lesson for this phase of the project is: if you aren’t comfortable with a certain material, insist that it be eliminated as an option early on. Occasionally you will be pleasantly surprised by such things, but more often, you know your tastes better than anyone else does.

Costs accrued during this stage:

Front canopy fabrication (Twisted Metalworks)$1,000.00
Galvanize front canopy (Scott Galvanizing)$416.10
Aluminum for redone canopy (Alaskan Copper & Brass)$687.00
Aluminum anodizing for redone canopy (Hytek Finishes)$300.00
Delivery of anodized aluminum for redone canopy (Pacific Delivery)$130.81
Delivery charges (Pacific Delivery Service)$352.18
Miscellaneous materials (Compton Lumber)$1,198.59
Aluminum fabrication for redone canopy (Special Projects Division)$832.20

A short post about the fireplace, the stairs, and the awesomeness of Bart

In the web business, there is a chain of people involved in most projects. Chronologically speaking, it goes something like this: client (who hires the firm), account planner (who writes the brief), designer (who designs the mocks), engineer (who writes the backend), and then the “front-end developer” (who puts all of the pieces together and makes the finished product work). As anyone in the web business knows, the person who often gets the short end of the stick is that last cog in the chain. Any number of delays or problems can occur earlier in the chain, and the last person is still expected to hit the agreed upon date.

In the design/build process, that person is the builder/foreman, and at Build LLC, that person is Bart Gibson. As Kevin, Andrew, and I muck around on details, drop the occasional ball, or change our minds on something, Bart is still expected to make all the ends meet, on time and on budget. Not only did he do exactly that — stage after stage, nail after nail — but he also lent his craftsmanship to two notably custom parts of the house: the blackened steel fireplace surround and the open bamboo stair treads.

The fireplace surround

As mentioned in We Have Fire, we ended up going with a modern Heat N’ Glo Cosmo fireplace. It’s a clean looking unit, but recessed into drywall, it doesn’t command a ton of attention. To give it more presence in the great room, Bart fabricated a custom blackened steel surround for it. The steel panels create a striking vertical stack while also providing a thermal mass heat conductor to more efficiently radiate heat throughout the room. Apparently you can blacken steel using either a hot or cold process. The hot process is extremely dangerous however (and can kill you) so thankfully Bart used the cold. It looks really great.

The bamboo treads

It’s very hard to find open stair treads that are more than an inch thick and don’t have unsightly bullnoses on them, especially in bamboo. Open tread regulations are much stricter than they were a few years ago because of fears that a child could fall through the treads, but if you plan correctly, you can fabricate custom stairs that are plenty safe but also minimal in appearance.

Starting with large slabs of bamboo plywood, Bart built each two-inch thick stair tread by gluing two one-inch slabs together using a special cut such that the whole thing looks like one two-inch thick solid piece of bamboo. They are really, really beautiful, and because Bart stained each one individually, they match the bamboo floor almost perfectly. If you’re looking for a really clean open tread design, this is a great way to go. The stairs took quite a bit of massaging to get perfect but Bart and the team at Build pulled it off flawlessly.

Costs accrued during this stage:

Blackened steel fireplace surround (Bart)$3,500.00
Stair tread parts and labor (Build LLC)$9,372.50