Bathrooms are a big deal. People sink a lot of money into them because of the labor and materials involved, but rarely do homeowners take a close look at the usability of their prospective new bathroom before opening their wallets. This post will discuss how we planned our bathrooms and what guidelines you should follow when designing your own.
To match or not to match
Most of this post will concentrate on the master bathroom, but one question that will come up early in your project is “does each bathroom need its own distinct personality?” Because of the wealth of materials and styles available, many people are tempted to design each bathroom to be much different than its peers. We designed our bathrooms in partnership with The NB Design Group and Build and both companies advised against trying to get too cute with individual bathroom styles. Each can have some distinct qualities, of course, but when you walk through someone’s house and one bathroom looks like the “aquarium” one and one looks like the “dark marble” one and another looks like “spartan” one, it tends to look a little forced. For this reason, we decided to follow the same general color and tile scheme for all of our four bathrooms. Some are nicer than others but they all look like part of a family.
It all starts with the shower
To me, the most important thing to get right in a master bathroom is the shower. You’re going to use it every day, and many times — if properly designed — it’s going to transport you from a murky web of morning grogginess and hangovers to a refreshed and invigorated state. Not only do you want to eliminate the common problems with showers but you also want to add the best components you can in order to maximize awesomeness. This is something you can do without building a brand new house by the way: take care of your shower and main bathroom and you’ll leave for work a much happier person.
The showerhead
If the most important part of the bathroom is the shower, then the most important part of the shower is the showerhead. I am a bit of a showerhead snob and we went through six heads before finding the perfect one. I will just go ahead and save you the time and tell you what the best showerhead in the world is: The Kohler Flipside. It is truly an amazing showerhead, and if you’re reading this blog without having started your new home yet, just do yourself a favor and buy it. They are on sale for $71 at Home Depot right now.
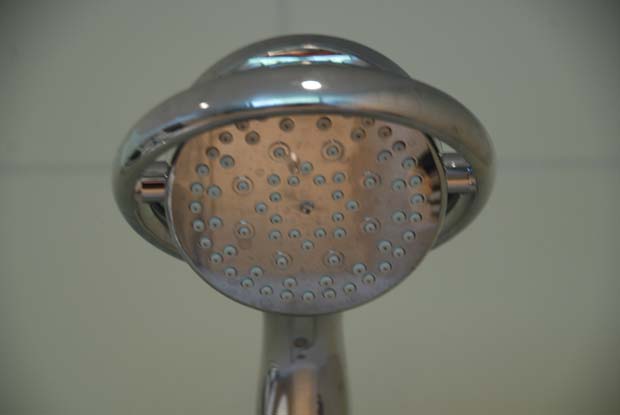
Let me count the ways I love this showerhead:
- You can easily remove the flow restrictor, creating an torrent of spray even Cosmo Kramer would appreciate.
- 3 of the 4 spray settings are wonderful. One feels like you’re going through a carwash. The problem with most multi-setting showerheads is that usually only one setting is good, and on that setting, you’re only using maybe 20% of the head’s nozzles. On the Flipside, you’re using all of the nozzles on whatever face you’re flipped to.
- It has a built-in handshower.
- It looks great.
- Both the girlfriend and I actually agree that it is the best showerhead ever, and we never agree on showerheads.
This showerhead is so good that I may buy an extra to have around for when this one needs to be replaced and it is inevitably discontinued.
Even if you’re not going to take my advice on the Flipside, make sure you have a shower arm installed that fits all standard half-inch showerheads. Originally we had a Kohler Purist showerhead (beyond terrible) and arm installed and unfortunately the arm is not separable from the head. This is a huge design problem, in my mind. A homeowner must be able to experiment with different showerheads and find their favorite.
Pipes and valves
You should have your shower lines run with 3/4 inch piping (as opposed to 1/2 inch) in order to make sure you have enough flow to do what you want. Similarly, pay special attention to what valves you specify. We originally had a standard Kohler thermostatic valve spec’d that not only was meant for a different type of system (the type where you control volume and temperature on the same knob), but also it only allowed about 5 gallons per minute through. If you have anything special in your shower like bodysprays, you’re going to need more than 5 GPM. We ended up installing the excellent Kohler 669-KS which will let a whopping 17.2 gallons per minute through if you want it to (which of course, we don’t).
Shower controls
The most important thing about shower controls is that they should not be placed underneath the showerhead. At least 90% of showers get this wrong, probably just out of builder convenience or laziness. You should be able to step into your shower, fiddle with your knobs, wait until the temperature is right, and then hop into the spray. Consider putting your controls as far away from the showerhead as possible. You’ll thank yourself every morning for it.
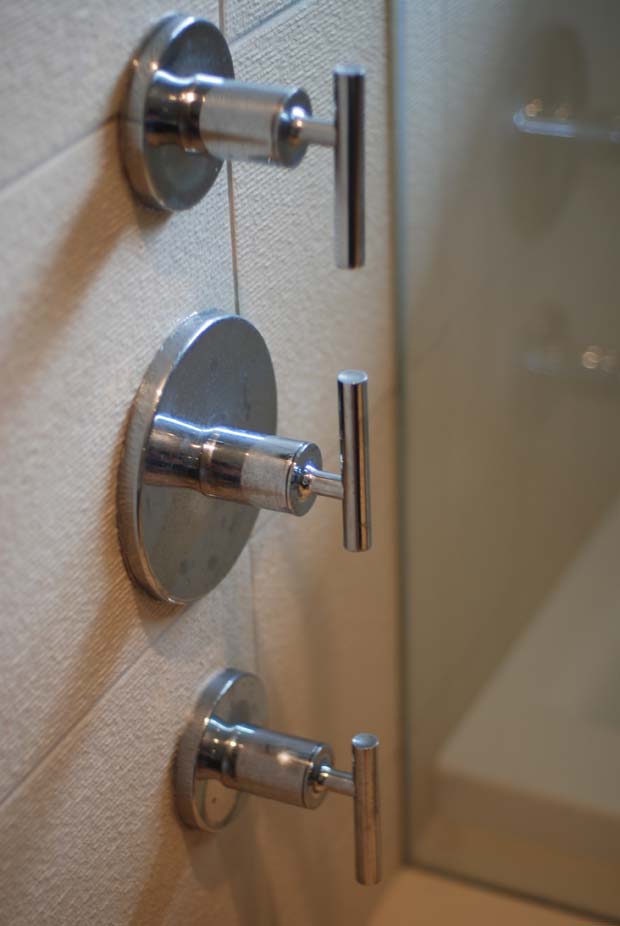
The other issue relating to controls is which type of user interface to go with. Most showers these days are controlled from a single knob that turns the water volume and temperature up simultaneous in a clockwise motion. It sickens me that this interface has become standard. I think it coincided with the 2.5 GPM MAX law, the thinking being “why would you ever want the water at anything less than full blast?”. I much prefer a knob for volume and a knob for temperature. That way, the temperature one stays in more or less the same position and the volume one(s) can be turned independently to affect flow. If you are designing a system like this, make sure your plumber knows your intention and make sure you buy the right valves and trim for it. Some plumbers will do this thinking for you. Others will not. Know which type you hired.
Bodysprays
We put two bodysprays in the shower just to make sure we had the option of using them, but we rarely actually do. They are nice to have occasionally, but I wouldn’t call them a must, especially if you have the Flipside. If you need to cut bodysprays out because of budget or installation challenges, I say go ahead. If you want them, however, maybe go with three instead of two.
Glass
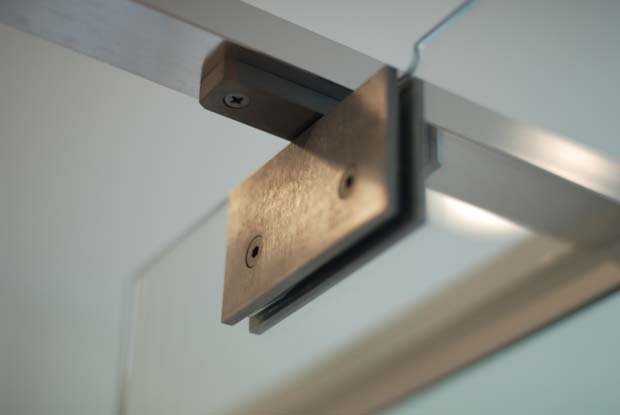
We went with a special type of glass called Starphire that has much less of a green tint around the edges. It is also a bit more etch-resistant than normal glass because it’s coated with something called Showerguard. It’s nice, and I recommend it, but not a must. The company who fabricated and installed our glass is Distinctive Glass.
Radiant heat, in the shower!
Since we did electric radiant heating pads underneath the tile in the master bathroom, Build surprised me and ran the pads right underneath the shower tile as well. Very, very awesome. No more curling of toes in the morning while inching into a cold shower. If you’re already doing radiant in the bathroom, there is no reason not to run it into the shower as well.
Shaving step
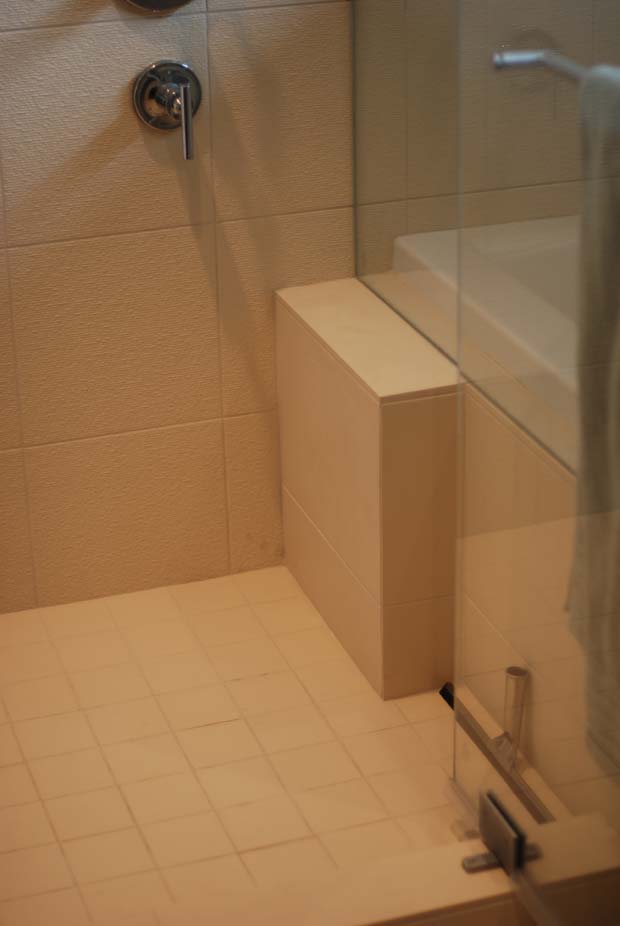
We had a small step built into the shower for leg shaving. You can do this with a wooden stool as well, but if you’re starting from scratch, might as well build the little step. It’s only maybe 6 inches deep, 15 inches wide, and a foot and a half tall, but it gets the job done… or so I’m told.
Alcove for bottles
Last but not least, we had a little alcove carved into the side of the shower to hold bottles and other shower-related things. Notably, we specified that the alcove be double-height with a glass shelf in-between. Shower alcoves never hold enough stuff so we were determined to build one that did. And it does.
… and those are the elements of a perfect shower.
The tub
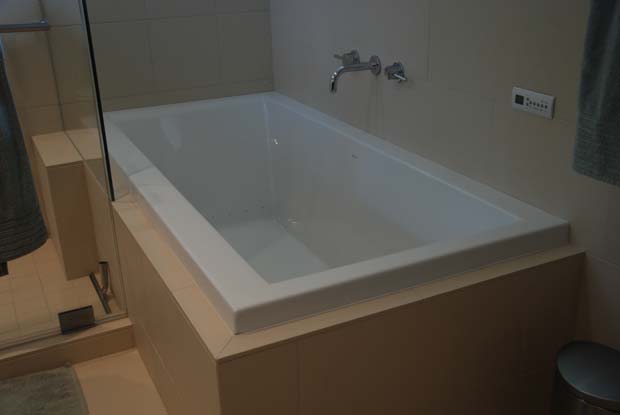
We debated whether or not to have a tub at all in the master bathroom given the hot tub on the roof, but it was only a few thousand dollars extra and there are definitely nights in Seattle which are too cold and wet to want to use mess with a hot tub, so we put one in. We ended up going with a BainUltra Origami, which is an “air tub”. Air tubs don’t use water jets but rather air jets. Because they don’t use water jets, you can safely use bath oils and salts without ruining the system. We call the two tubs Fat Man and Little Boy. I haven’t actually used Little Boy yet, but the girlfriend says it’s the best bath in the world… so there’s that. Also, another bonus about the Origami is it lacks “old man handles”… the ugly clear plastic handles that adorn many popular baths.
Tile strategy
One of the most difficult parts of the entire building process was getting a grip on tile strategy. There are just so many different types of tiles out there (and most will be dated within years or months) that it’s tough to know where to start. Nancy Burfiend at the NB Design Group and the folks at Build gave us some great guidelines that we ended up following:
- Use big tiles to make small spaces look bigger
- Use the same tiles up the walls that you use on the floors
- Use ceramic tile for durability and timelessness
- Use a tile with a different texture or size as your main tile (but the same color) to add interest without being over the top
Using these guidelines, we chose off-white ceramic tile, ran it across the floor and halfway up the walls and then used smaller and grainier versions of the same for inside the shower. For the backsplash, we went with small glass subway tile. Neric Pro Build did all of the tile installation for a very reasonable price, and with a little bit of coaching and oversight, everything turned out swimmingly.
Faucets and sinks
Sinks are largely a personal affair, but we found what we wanted with these Ronbows. Simple, modern, white, and not likely to be dated any time soon. Vessel sinks are nice and all but every time I see one, I look at my watch and wonder how many months until they are out of style.
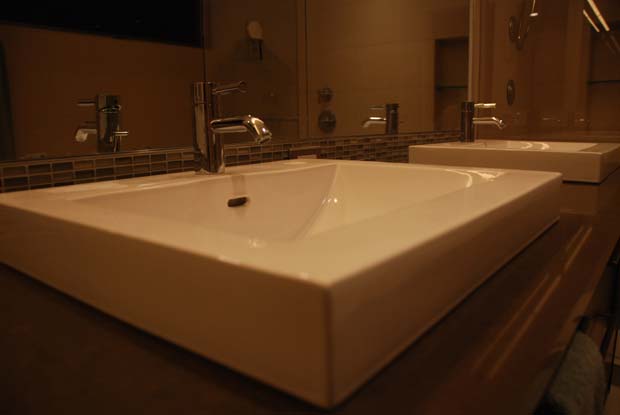
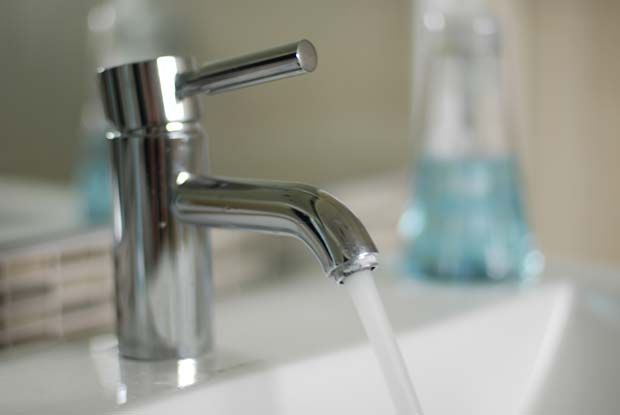
For the faucets, we fell in love immediately with the famous Dornbracht Meta series. What we didn’t fall in love with, however, was the price. I searched for weeks online and around town for a decent Dornbracht knockoff, but every single one had something wrong with it. Too fat, too thin, not the right angle, etc etc. None of them matched the beauty of a real Dornbracht.
Then, I finally found one! It’s called the Taron 101 and it’s available for about half the price of the Dornbracht. We ended up doing real Dorns in the master and three Tarons elsewhere around the house, and I have to say, I almost like the Tarons better. They seem very well built, and for half the price, I’m diggin’ em.
The following paragraph is intended to help others in their similar quests for reasonably priced Dornbracht alternatives by indexing some search terms on Google… please ignore if you’re a human:
dornbracht knockoff, dornbracht copy, cheaper dornbracht, dornbracht alternative, affordable dornbracht, imitation dornbracht, generic dornbracht, chinese dornbracht
If you came in from Google because of that paragraph, you’re welcome.
Countertops
As in the kitchen, we went with quartz countertops in the bathrooms. While the kitchen is Pental Chroma, the bathrooms are Cambria. Quartz is affordable, durable, and modern. A perfect fit for our needs.
Audio
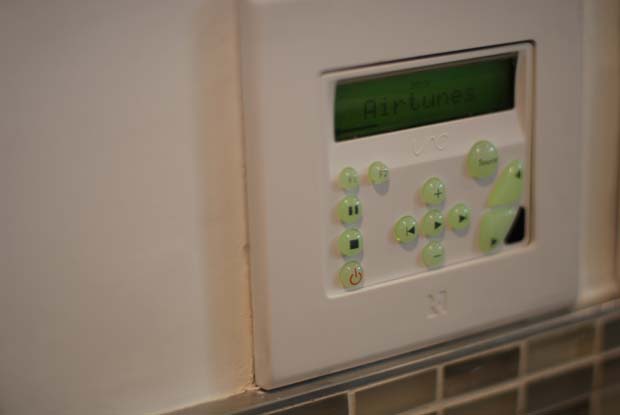
While my friend Danny advised putting audio in every bathroom and I felt like I needed one, we went ahead and wired just the master into the whole house audio system. We don’t use it much, but it’s a good move if it’s on your agenda.
Commodes
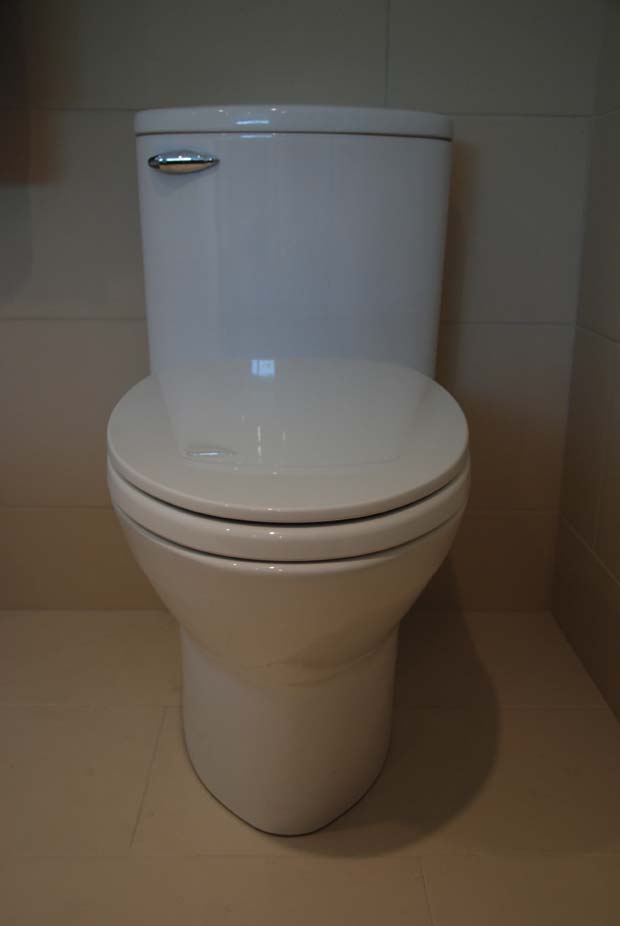
Our toilets are Toto Pacificas. Affordable, modern, and a simpler-than-usual design that allows for easy cleaning. Wall mounted toilets are also nice, but we opted for simple, proven floor mounted ones.
Radiant heat
As mentioned above, we ran electric radiant heating pads underneath our tile. These are on a simple digital timer which cranks the tiles up to 85 degrees or so for an hour or two in the morning and then keeps the heat off for the rest of the day. For several hundred dollars, it’s a worthy addition.
A recirc line
If your master bathroom is far away from your water heater, you’re going to want your plumber to run a “recirc line” from the water heater to someplace near your bathroom. The recirc line is on a timer and runs a fresh supply of hot water close to your bathroom so it doesn’t take three minutes for your shower to get warm. Smaller houses or houses with multiple tankless water heaters may not need this, but if your water tank is two floors below your bathroom, you will get great use out of this little bit of technology.
Lighting
Finally, there is the lighting. We put standard 5 inch cans in our bathrooms with the notable addition of Alinea bars in our master and powder room. Alineas are seldom-used fixtures that provide an interesting type of lighting: linear incandescence. Think of a long florescent tube but with a nice warm incandescent glow instead of a cold harsh florescent one. We put a long one of these above the mirrors. On the upside, it warms up the space nicely. On the downside, it cannot be dimmed without buzzing so it’s either all on or all off. Some people recommend placing lighting on the sides of your mirrors instead of above, but the Alinea seems not to cast the sorts of shadows this advice aims to avoid.
Wrap up
And so there you have it… the elements of a well-designed bathroom. Whether you’re building new, remodeling your current place, or just hate your showerhead, hopefully you can apply principles from this post to your own projects. Bathrooms are only about looks when you sell the place or are entertaining… all other times, they are about usability. Pay close attention to the usability of your bathrooms and you’ll forward to more of your mornings.
UPDATE: For a lot more shots of the bathroom details, check out the Bathroom section in the photo gallery.
Costs accrued during this stage:
| Two Broan medicine cabinet mirrors (kitchensource.com) | $274.00 |
| Two replacement Broan medicine cabinet mirrors (ventingdirect.com) | $325.00 |
| Bathroom mirrors and shower doors (Distinctive Glass, Inc) | $5,038.35 |
| Gatco Latitude II Towelbars/Holders/Etc. (ComfortHouse.com) | $366.70 |
| Modern Bathroom (Chinabrachts) | $675.00 |
| Buy Aggressive (Cascade Bath Filler) | $337.39 |
| Seattle Interiors (Laufen Palomba sink) | $929.38 |
| Blanco Magnum kitchen sink (HomePerfect) | $598.29 |
| Hansgrohe Interaktiv S kitchen faucet (HomePerfect) | $310.75 |
| Two Dornbracht faucets | $922.40 |
| Plumbing installs | $13,681.43 |
| Counter and tile work - kitchen+baths (Neric Pro Build) | $24,703.20 |